Project Water Heater

Boats, man.
Someone once told me "all boats are sinking, it's just a question of how fast."
Friday morning, as I was starting to sip my freshly brewed coffee, I heard the water pump run briefly. That's odd. There is some swell in the anchorage, so maybe the pressure tank settled or released an air bubble. Maybe it won't happen again...
It happened again. And again. Ok, we are sinking. Very slowly, but still. It's time to find the culprit. I haven't even finished my first cup of coffee, for crying out loud...
It's the fresh water pump that's running, so that eliminates leaks in the hull. We aren't sinking fast. (Technically, we aren't sinking at all. The fresh water that's leaking is already on the boat, it's just being moved from one place to another, and it'll run out at some point. Of course, I'd like to stop the leak before we run out of fresh water, so this is still fairly urgent.)
I checked the bilges in both hulls and in both engine bays, all dry. Hmm...the leaking water has to be accumulating somewhere...
The deck washdown hose fitting has a fresh water connection; it's in the forward lazarette and it drains directly overboard. Maybe that's it? Nope, completely dry.
Uh...uh...ok, the pump is still running periodically, let's turn it off until I can think some more. Clearly I need a LOT more coffee.
Lynda is still in Georgia, but is doing her best to help me think through things. She is frustrated at not being here to help.
What else could it be? I opened access panels everywhere and had a look at the mixer valves for the sink faucets and showers. They all look dry. This makes sense, since the bilges are dry.
Ok, let's run through the systems bow to stern. On port, I checked the bilges and faucets. What else is on this side? Nothing in the forepeak, what about the forward cabin? The reverse osmosis watermaker system! It's connected to the fresh water supply. Moving things around, I finally get access to the device, it's dry. Fine. I'll put everything back where it was.
On starboard, I already checked the shower and sink faucets. What about the clothes washer? Ugh, getting to the water connections would be a pain, and I should see the water draining into the main bilge if that was the problem.
I decided to open another access panel that leads under the galley where water pipes run, all dry. The aircon unit only uses sea water, not fresh water, so that can't be it.
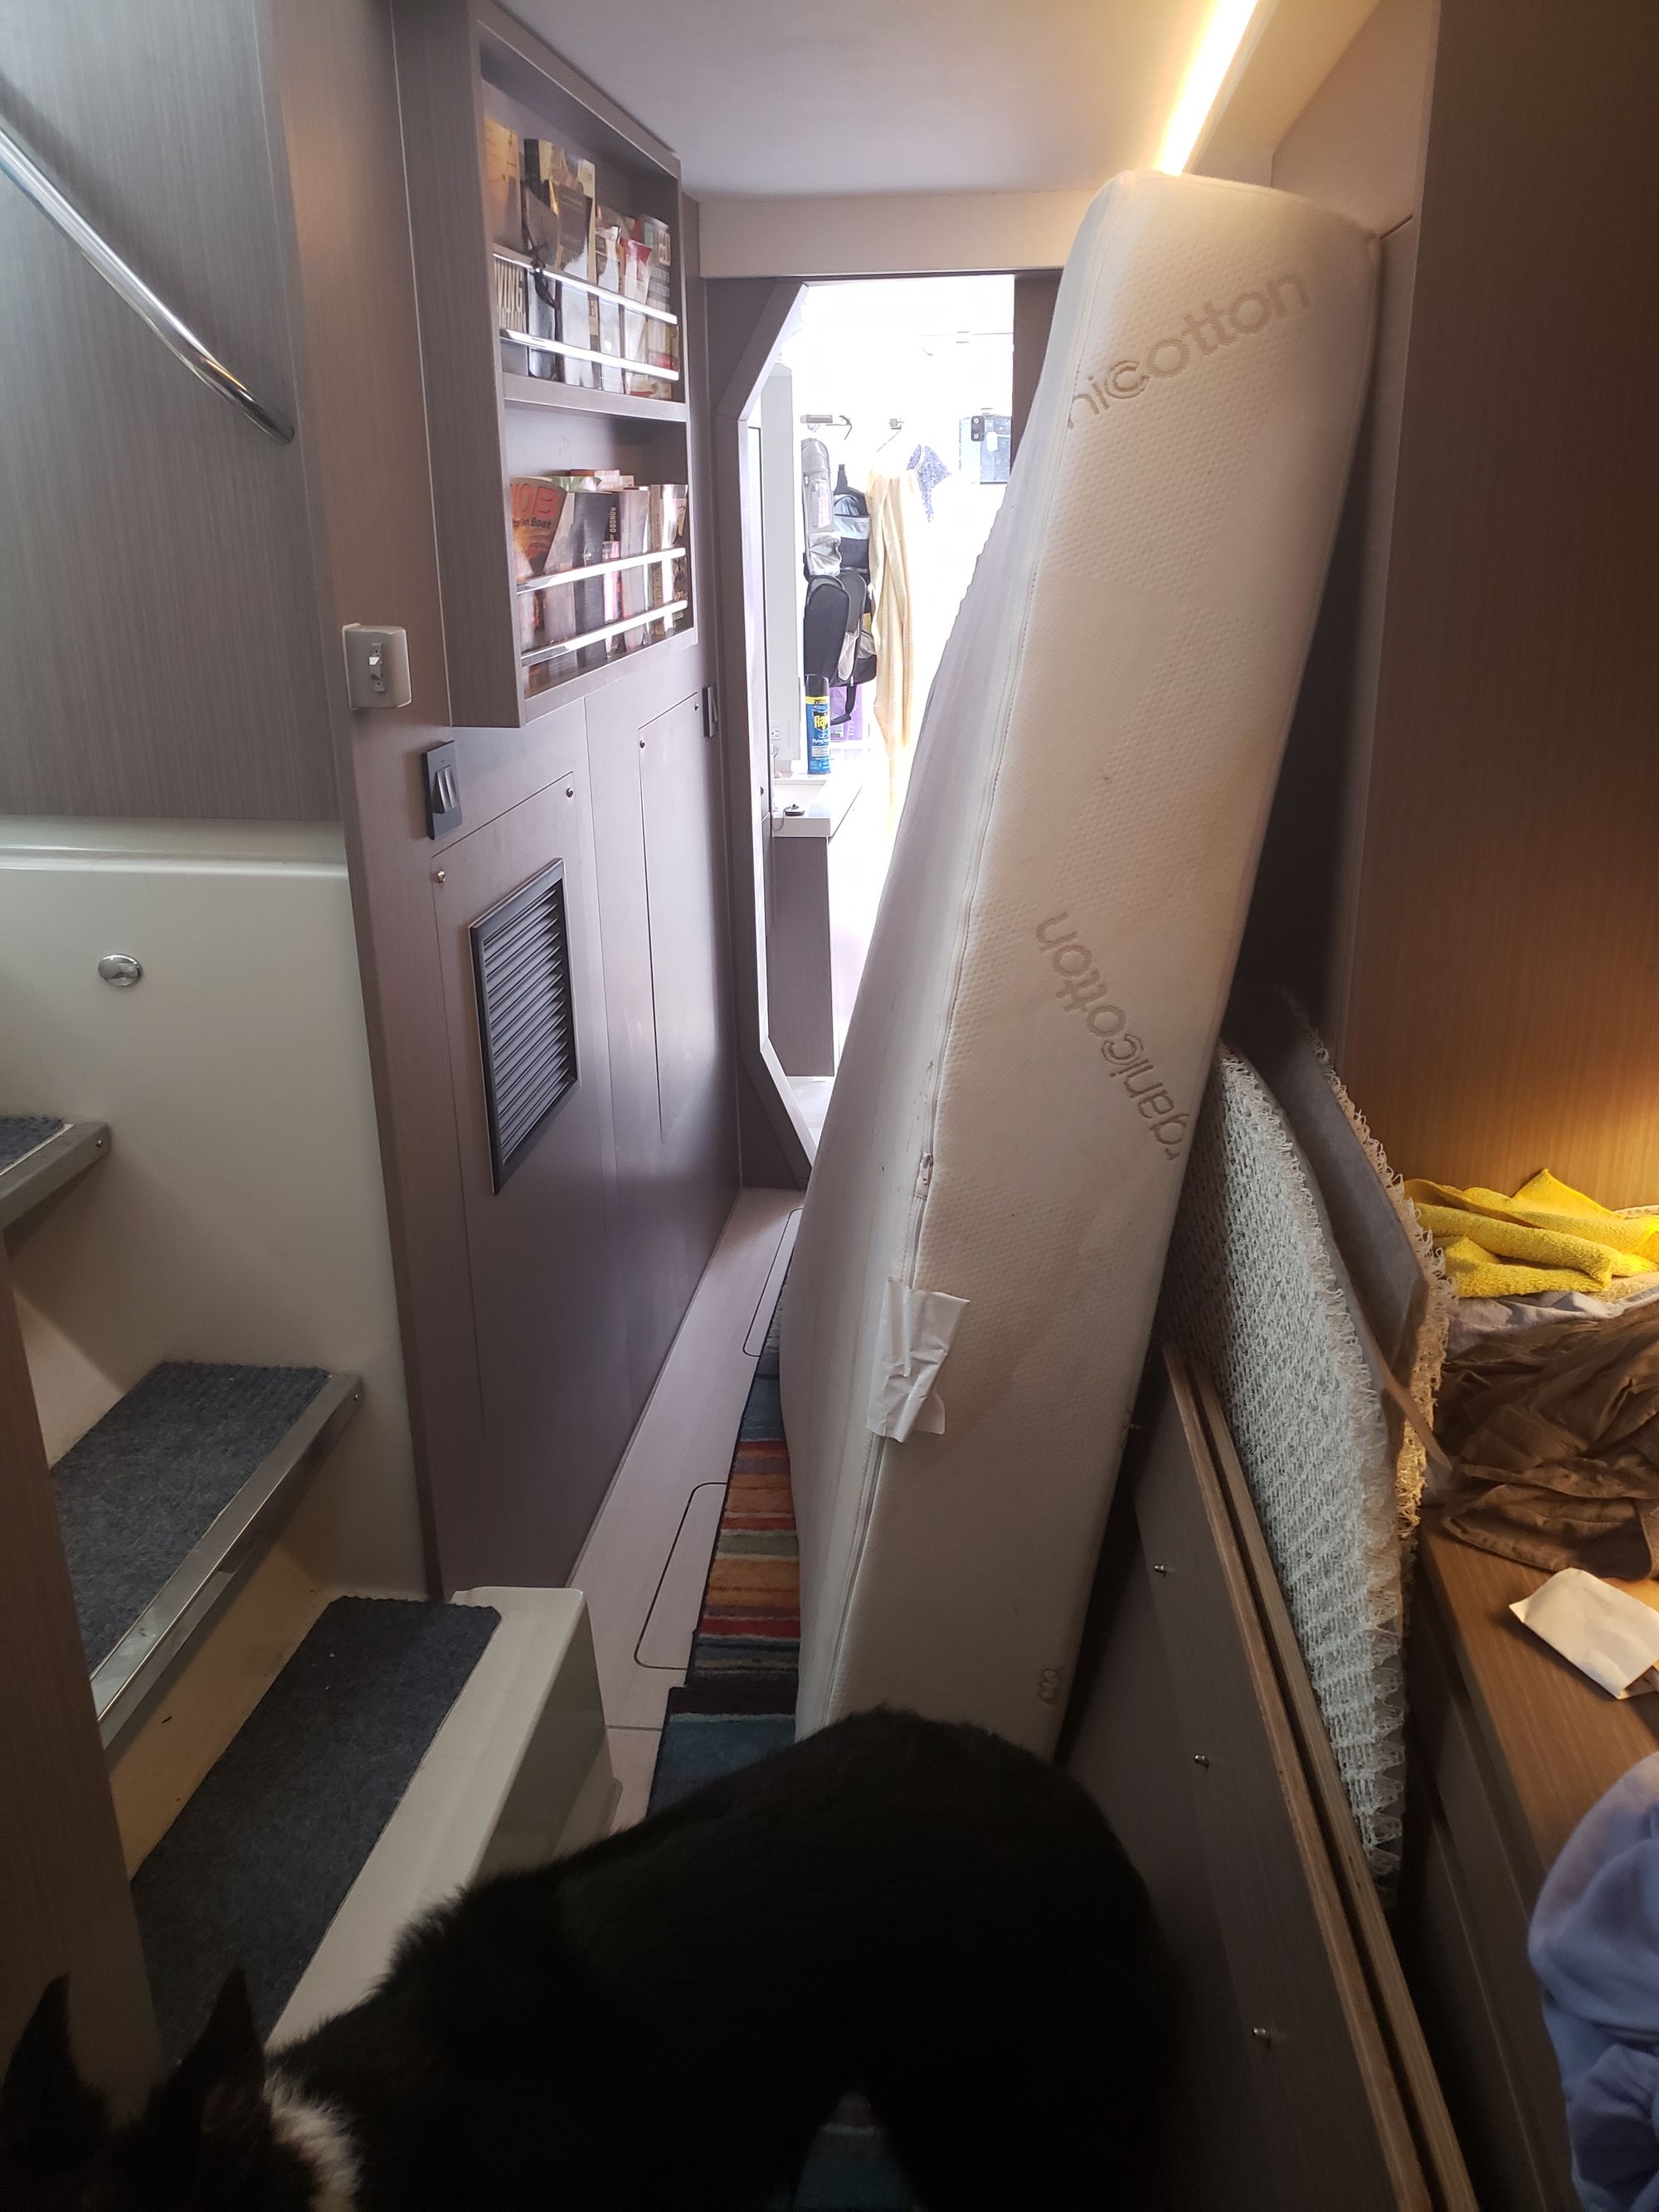
Looking further back in the hull, I only see the bed in our cabin. What's under there? The diesel tank. That can't be it. Ah! The water heater!
Lifting up the mattress and access panel, sure enough, that was it, there is a separate bilge in there that doesn't drain into the main bilge, and there were a few gallons of water sloshing around. This bilge is separate so that if the diesel tank leaks, fuel won't be pumped overboard.
Let me check the water heater on the port side just to be thorough...dry. Thankfully the leak is just on the starboard side.
Ok, the water pump is still off, we aren't sinking any faster than normal, I can relax and finish my coffee. The next step is going to be quite a workout.
I have to remove the mattress from the bed. We have a 10" memory foam mattress that was made into a custom shape for the bed. It's incredibly comfortable and gives us a great night's sleep. It's also bulky, heavy, and seems to grow limbs, resisting any effort to move it. With 2 people, we can usually force it to comply, but with just 1 person, it's more like asking nicely and trying to catch it off guard. "Hey, look, a squirrel!"
It only took me 15 minutes this time, but I'm concerned that it will be more wary of my tricks next time.
And there's nowhere really to put it, so it sort of just fills the hull, standing up on edge.
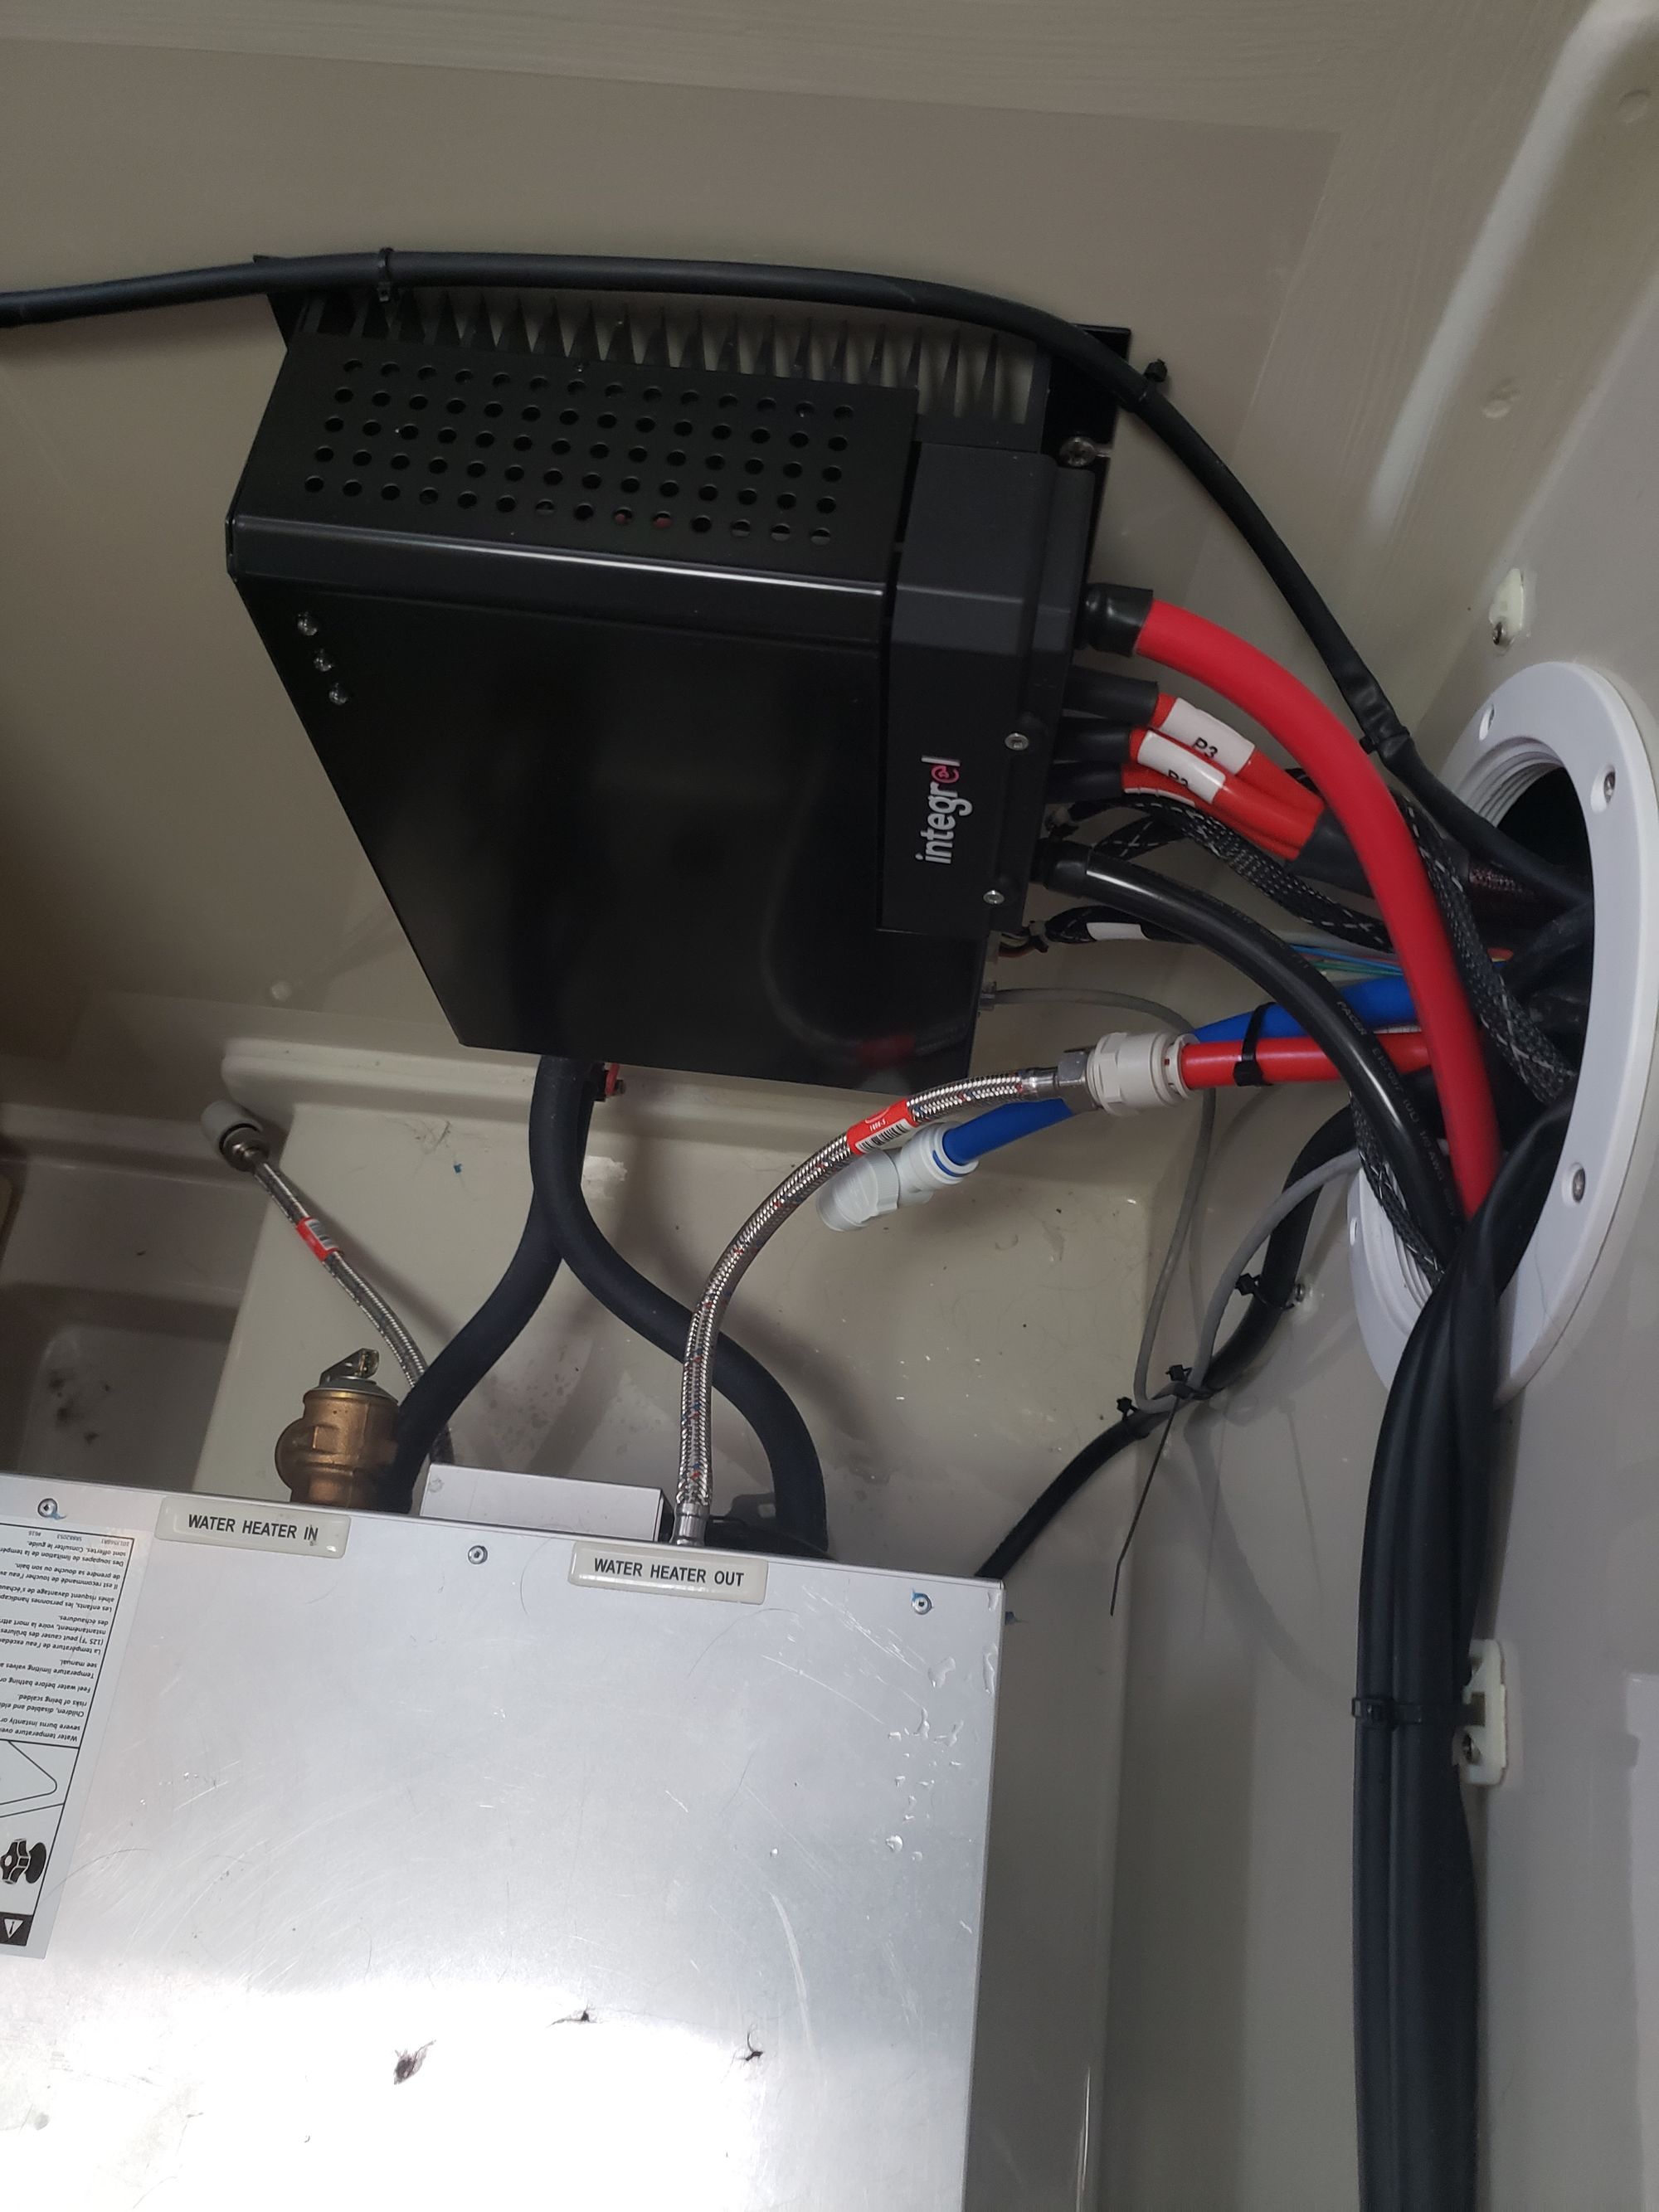
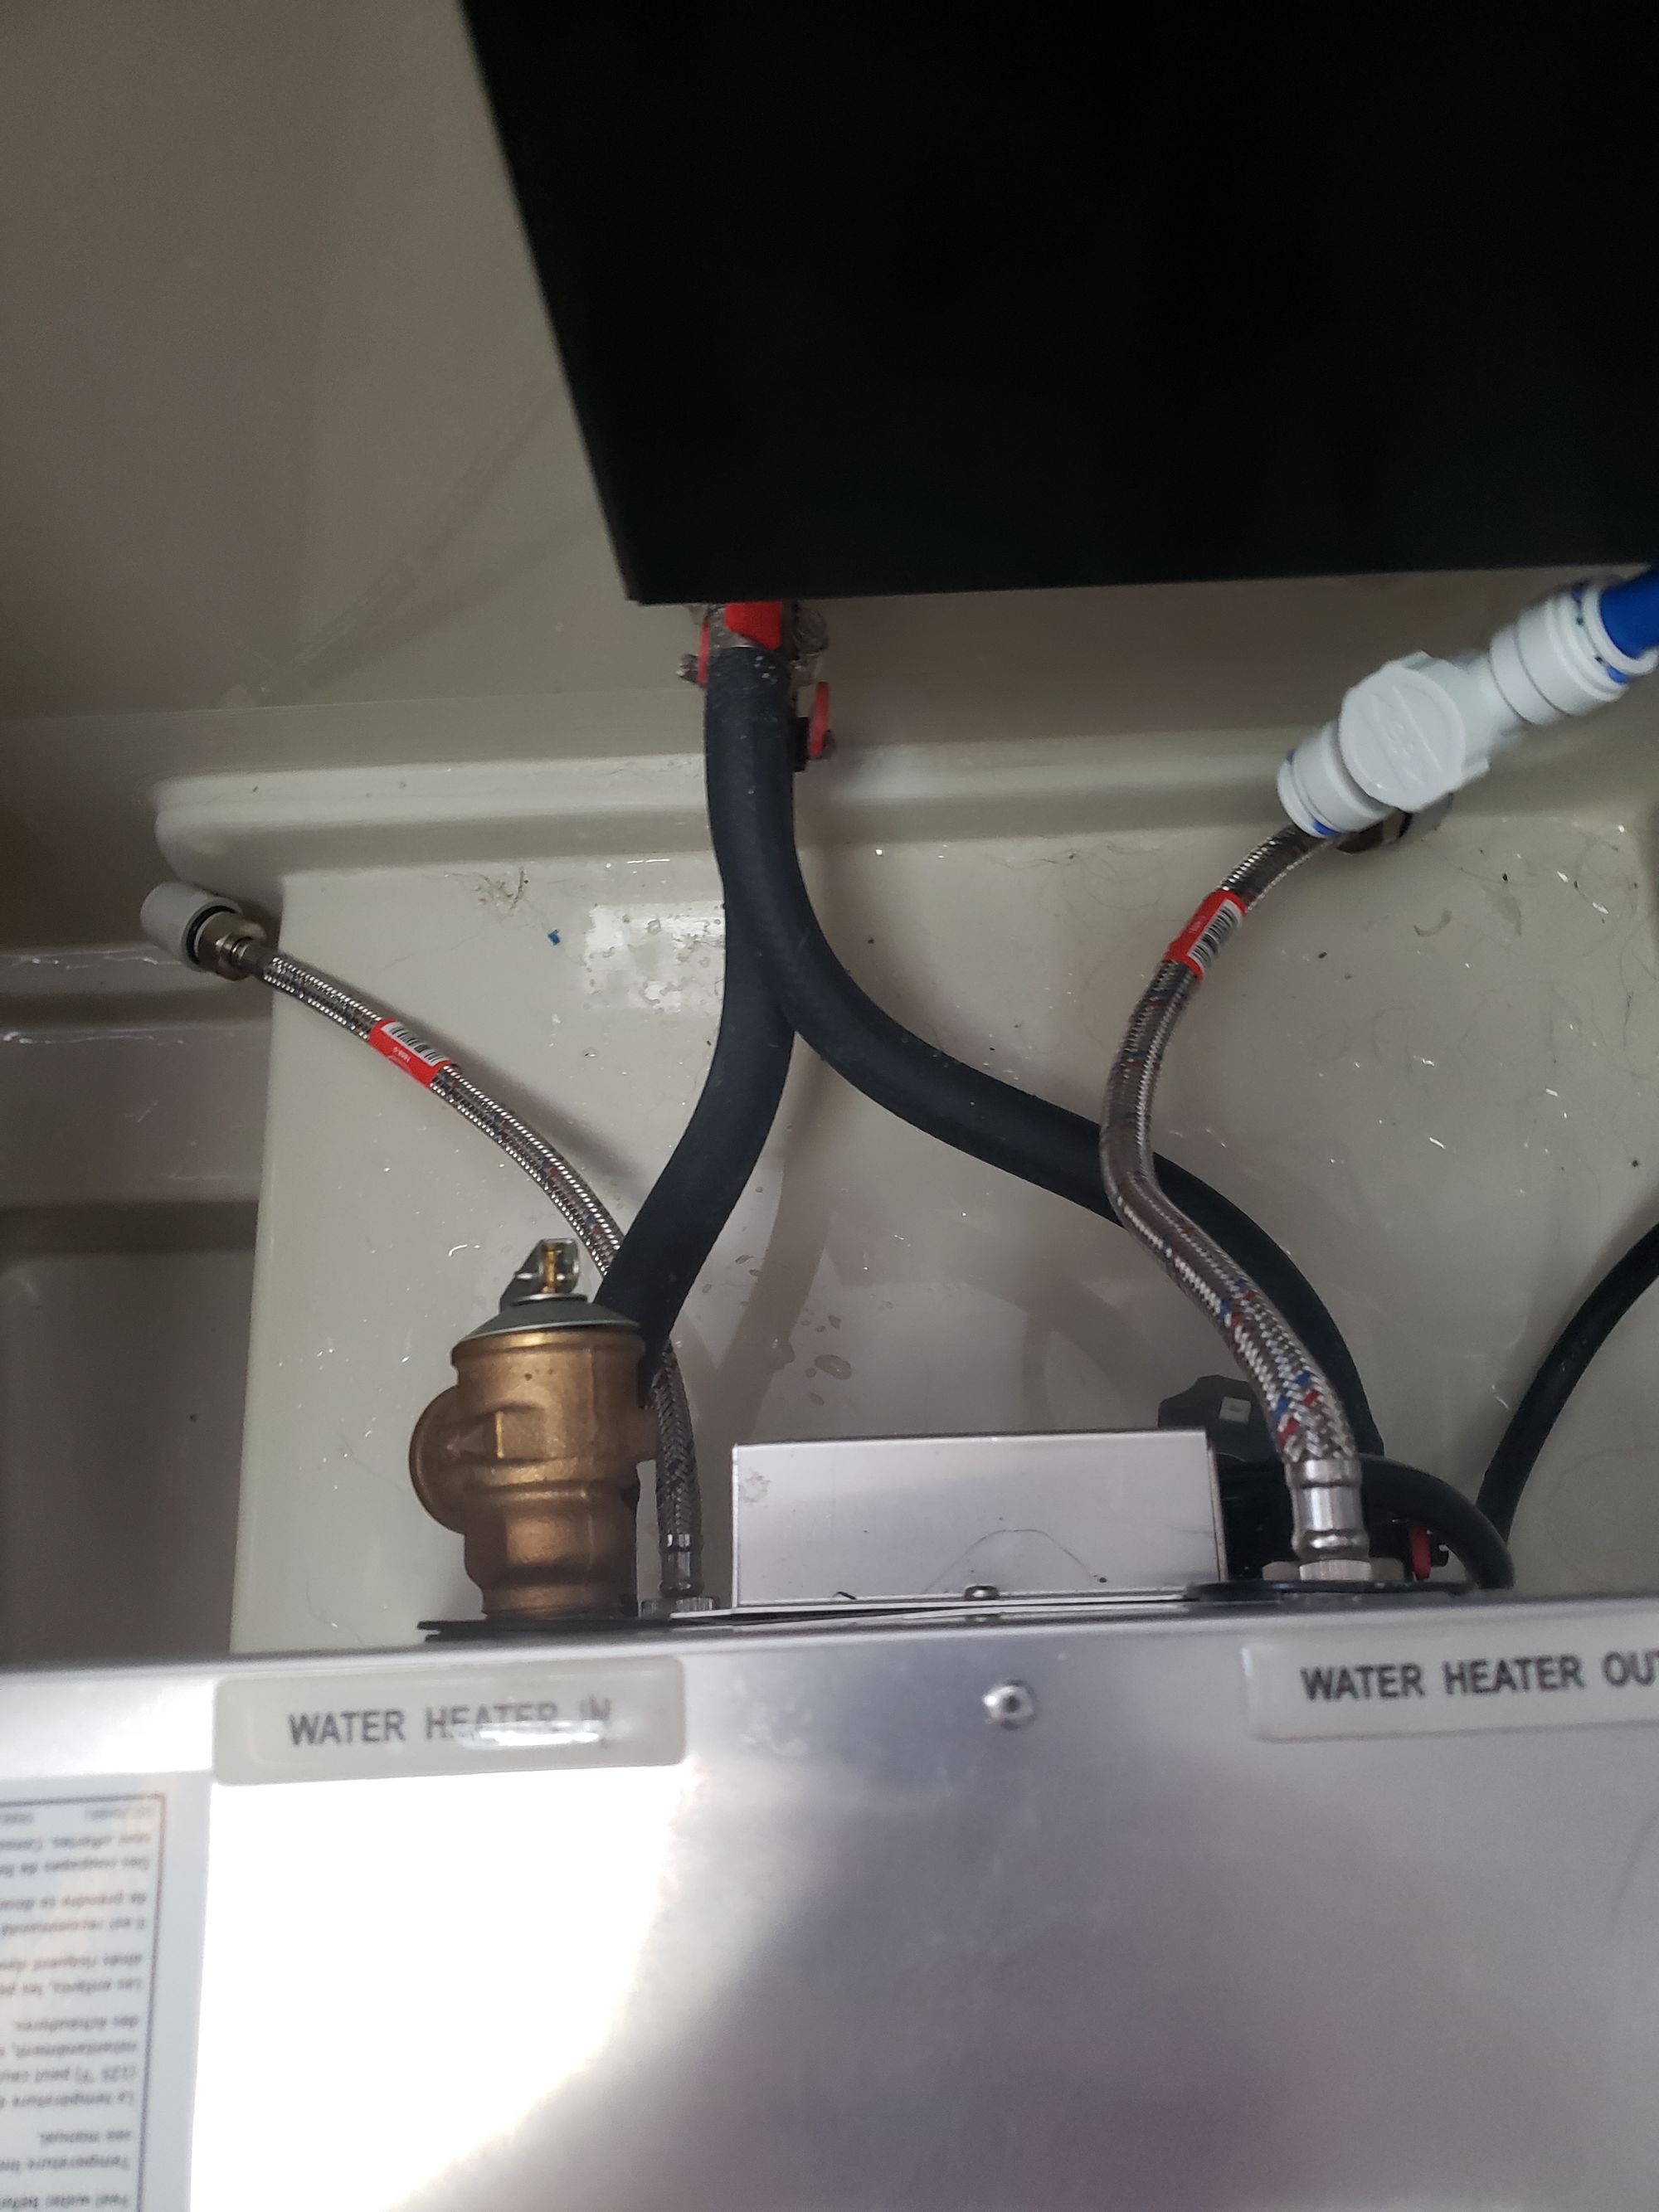
Of course, my next step is to drain the water heater so that I can disconnect the hot and cold water pipes and cap them off. That's a lot of water in the bilge. The water heater only holds 6 gallons of water, but it had been leaking for a while, and the water that's currently in the hot and cold water lines will drain out once I disconnect them. For whatever reason, Leopard didn't install valves on these lines...
Success! The cold water pipe has a valve on it now. I don't have any more valves on board, so I'll have to do the other one later (and the port side water heater much later). With this in place, at least I can turn the water pump back on and restore water service to the rest of the boat.
Now I get to remove the water from the bilge.
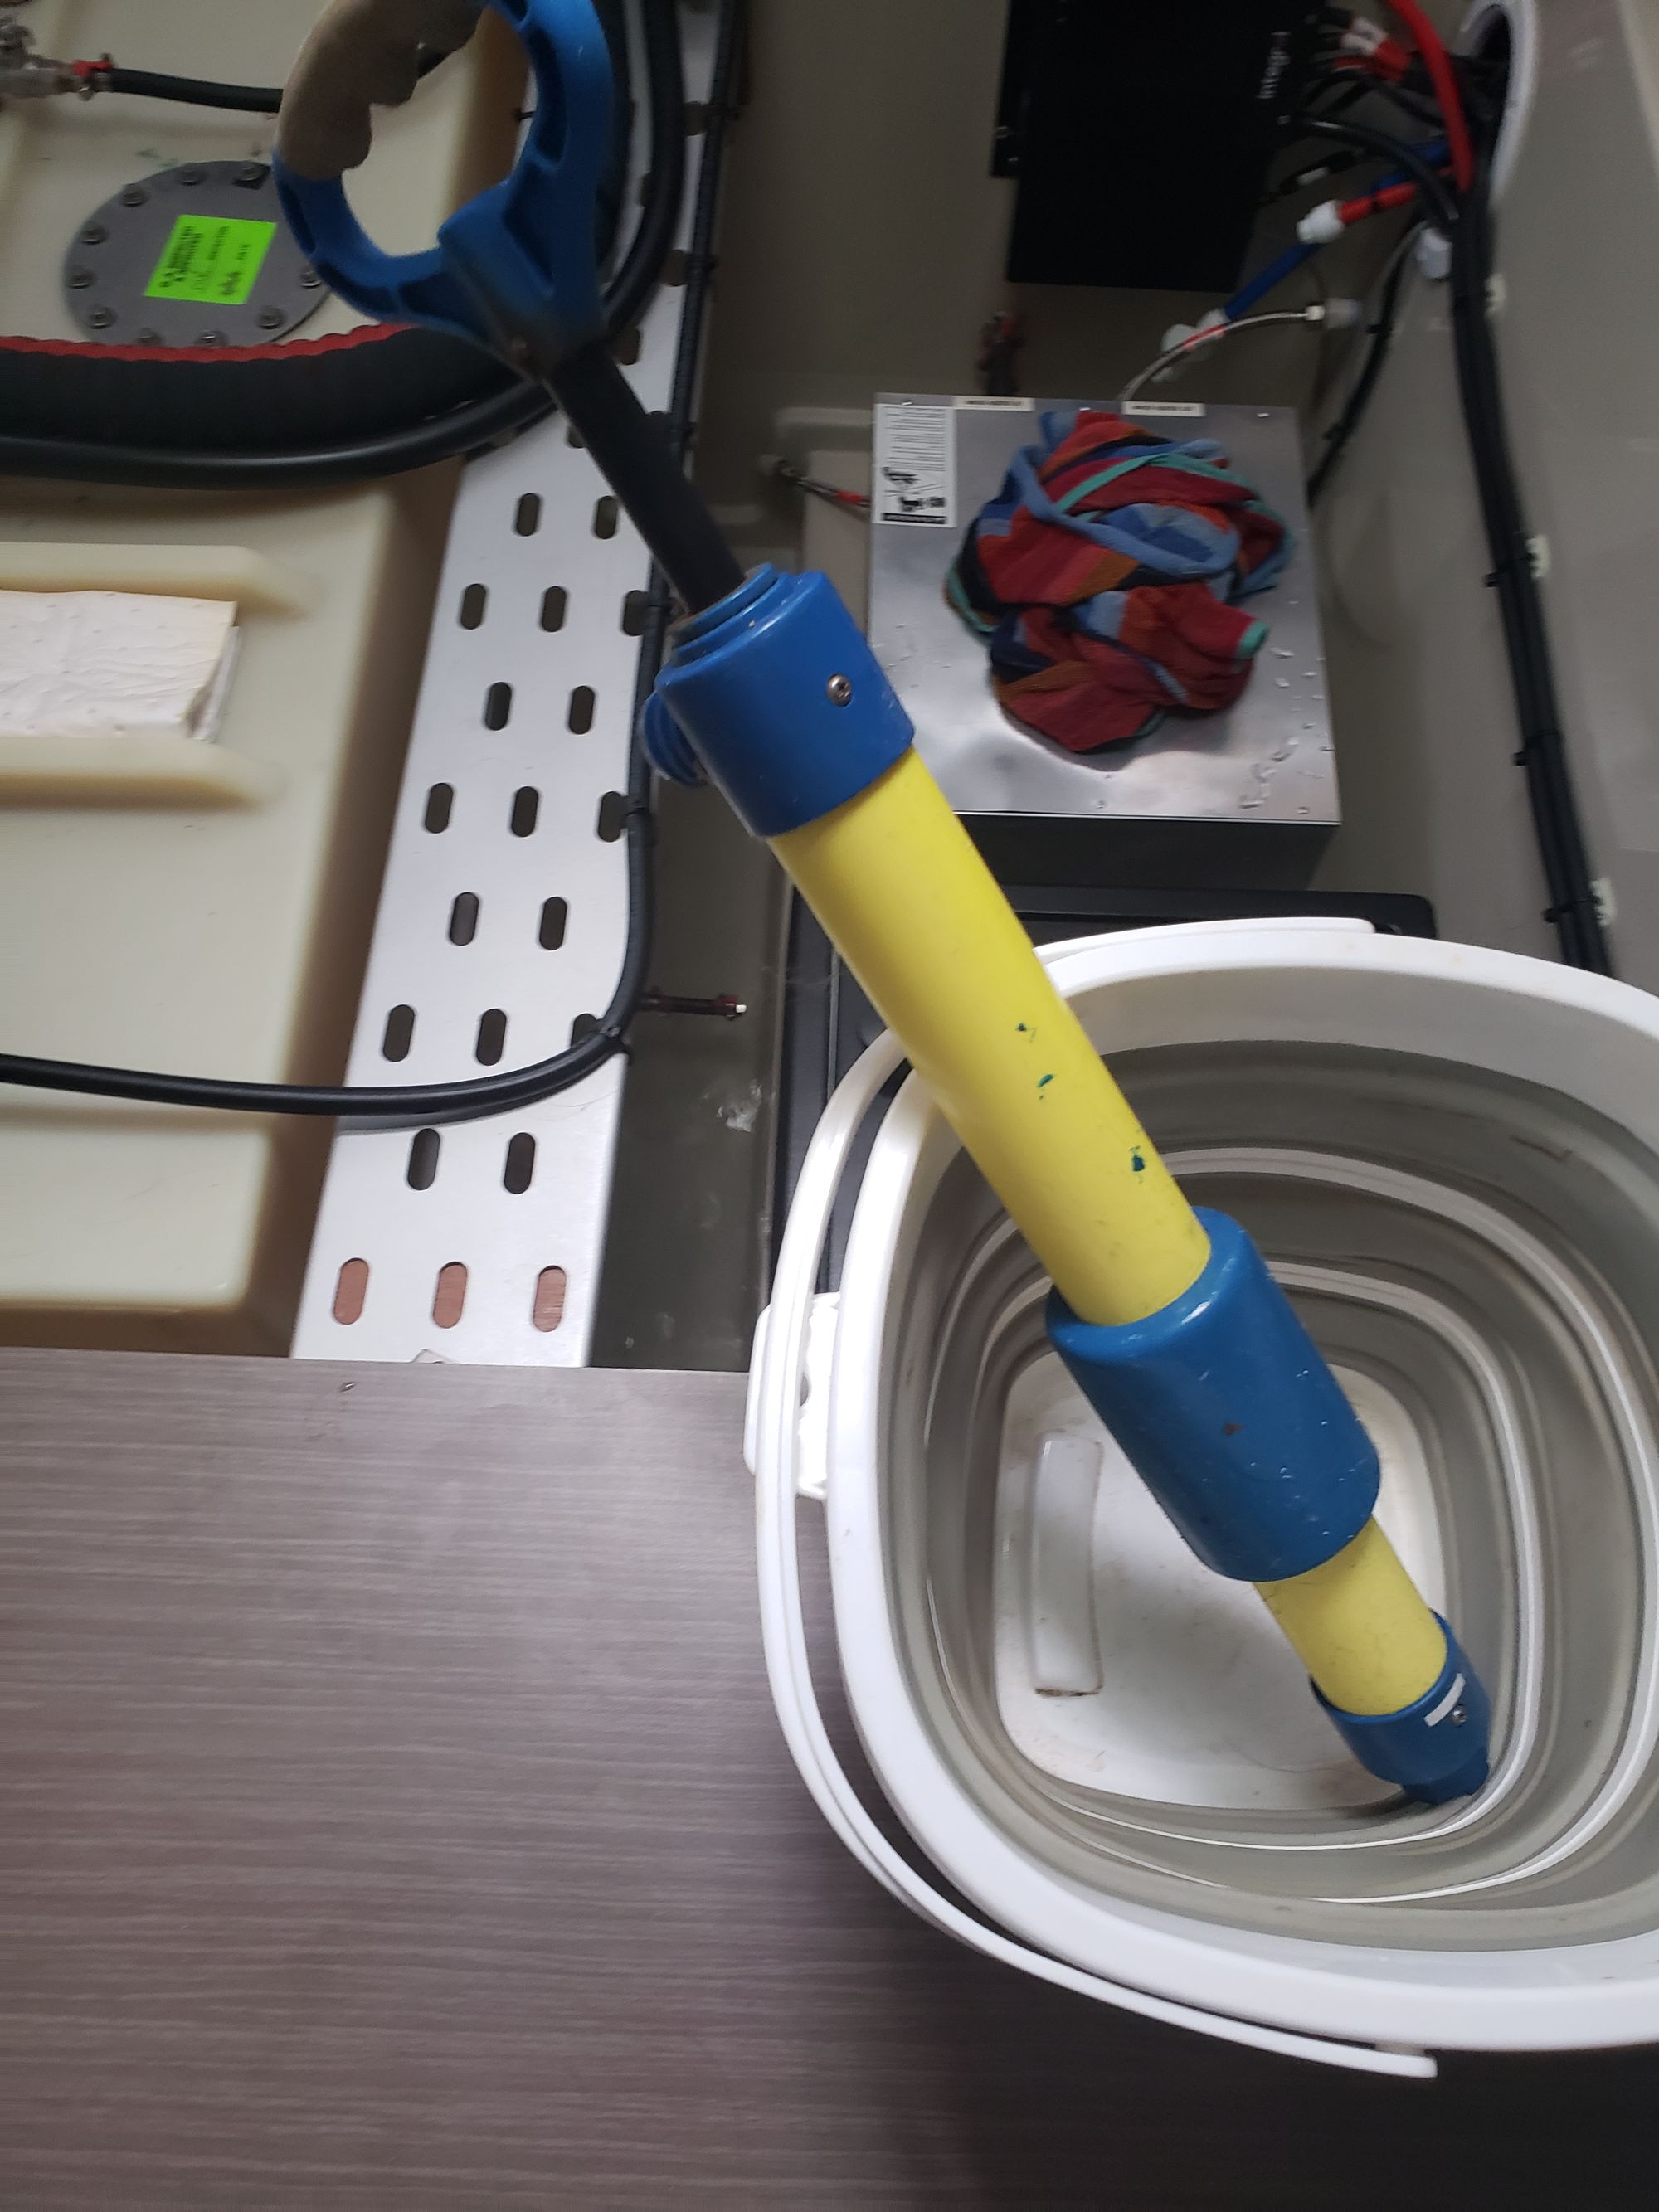
It only took me 4 trips with a full bucket to get all of the water out. I used a towel to sop up the remaining drops. I'll leave the area open with fans running to help evaporate the remaining moisture.
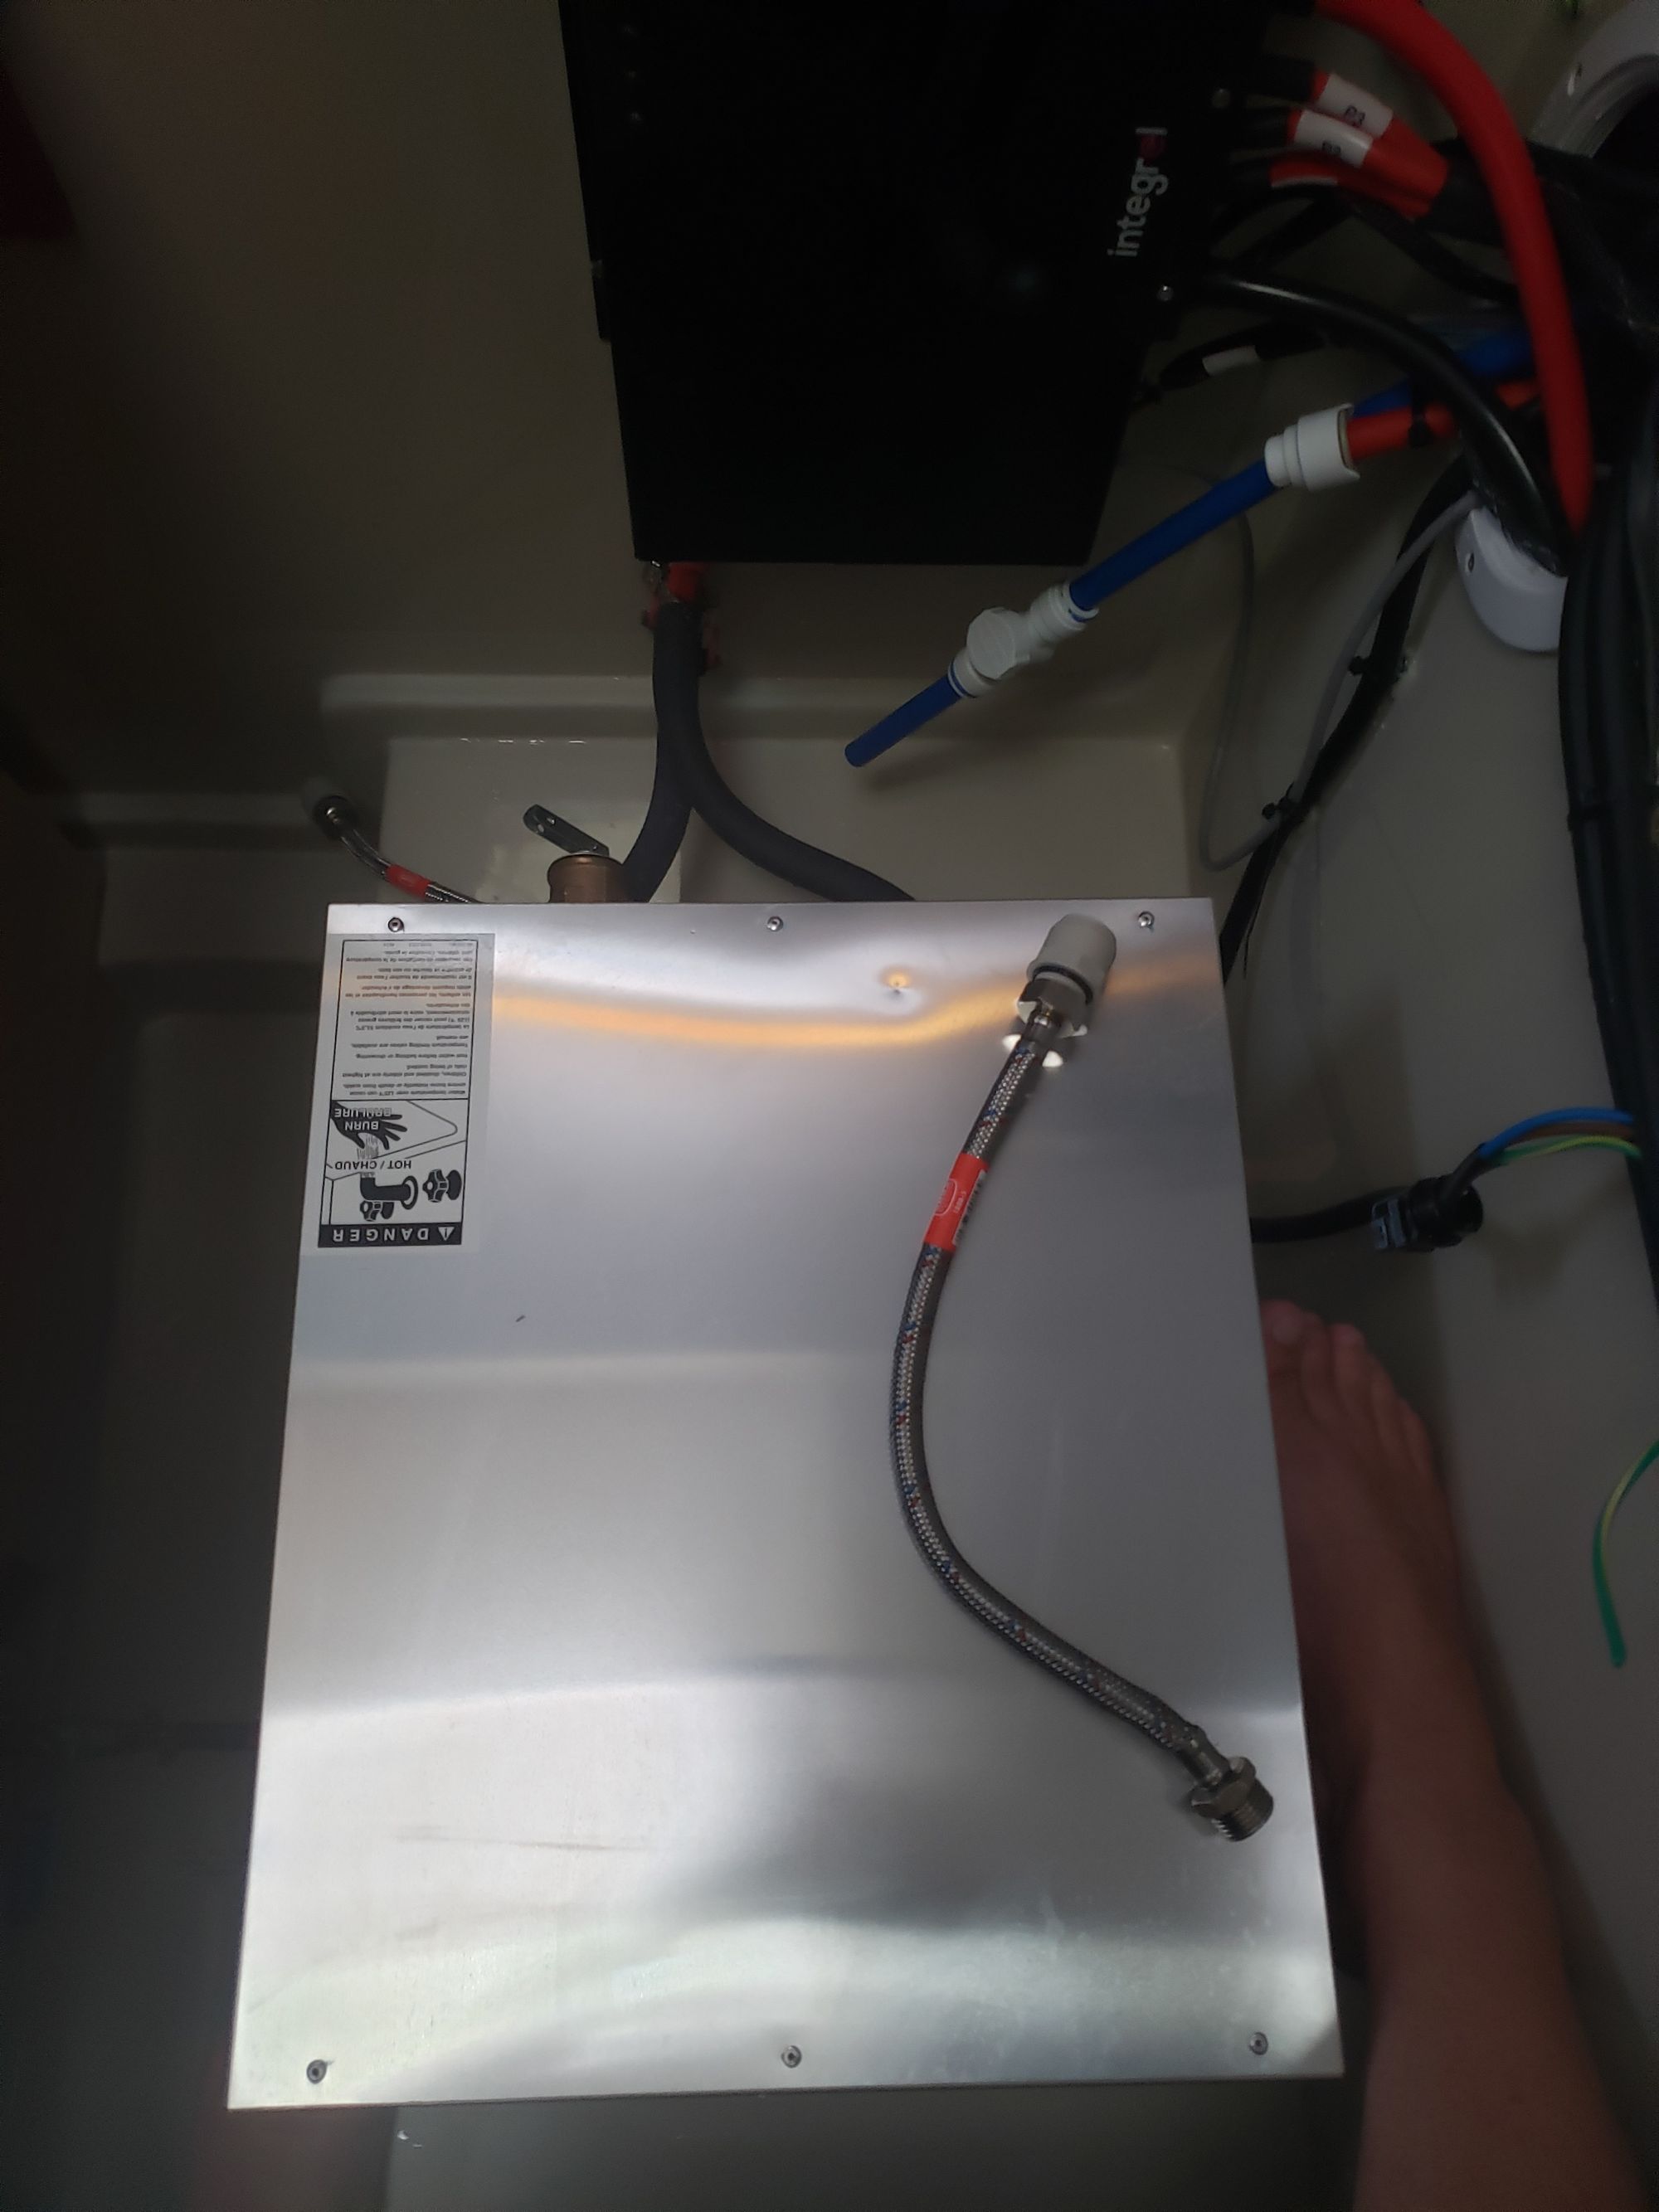
Getting the hot and cold water pipes disconnected and capped off was easy enough, but there are more connections that have to be addressed: electrical, and the engine heat exchange loop.
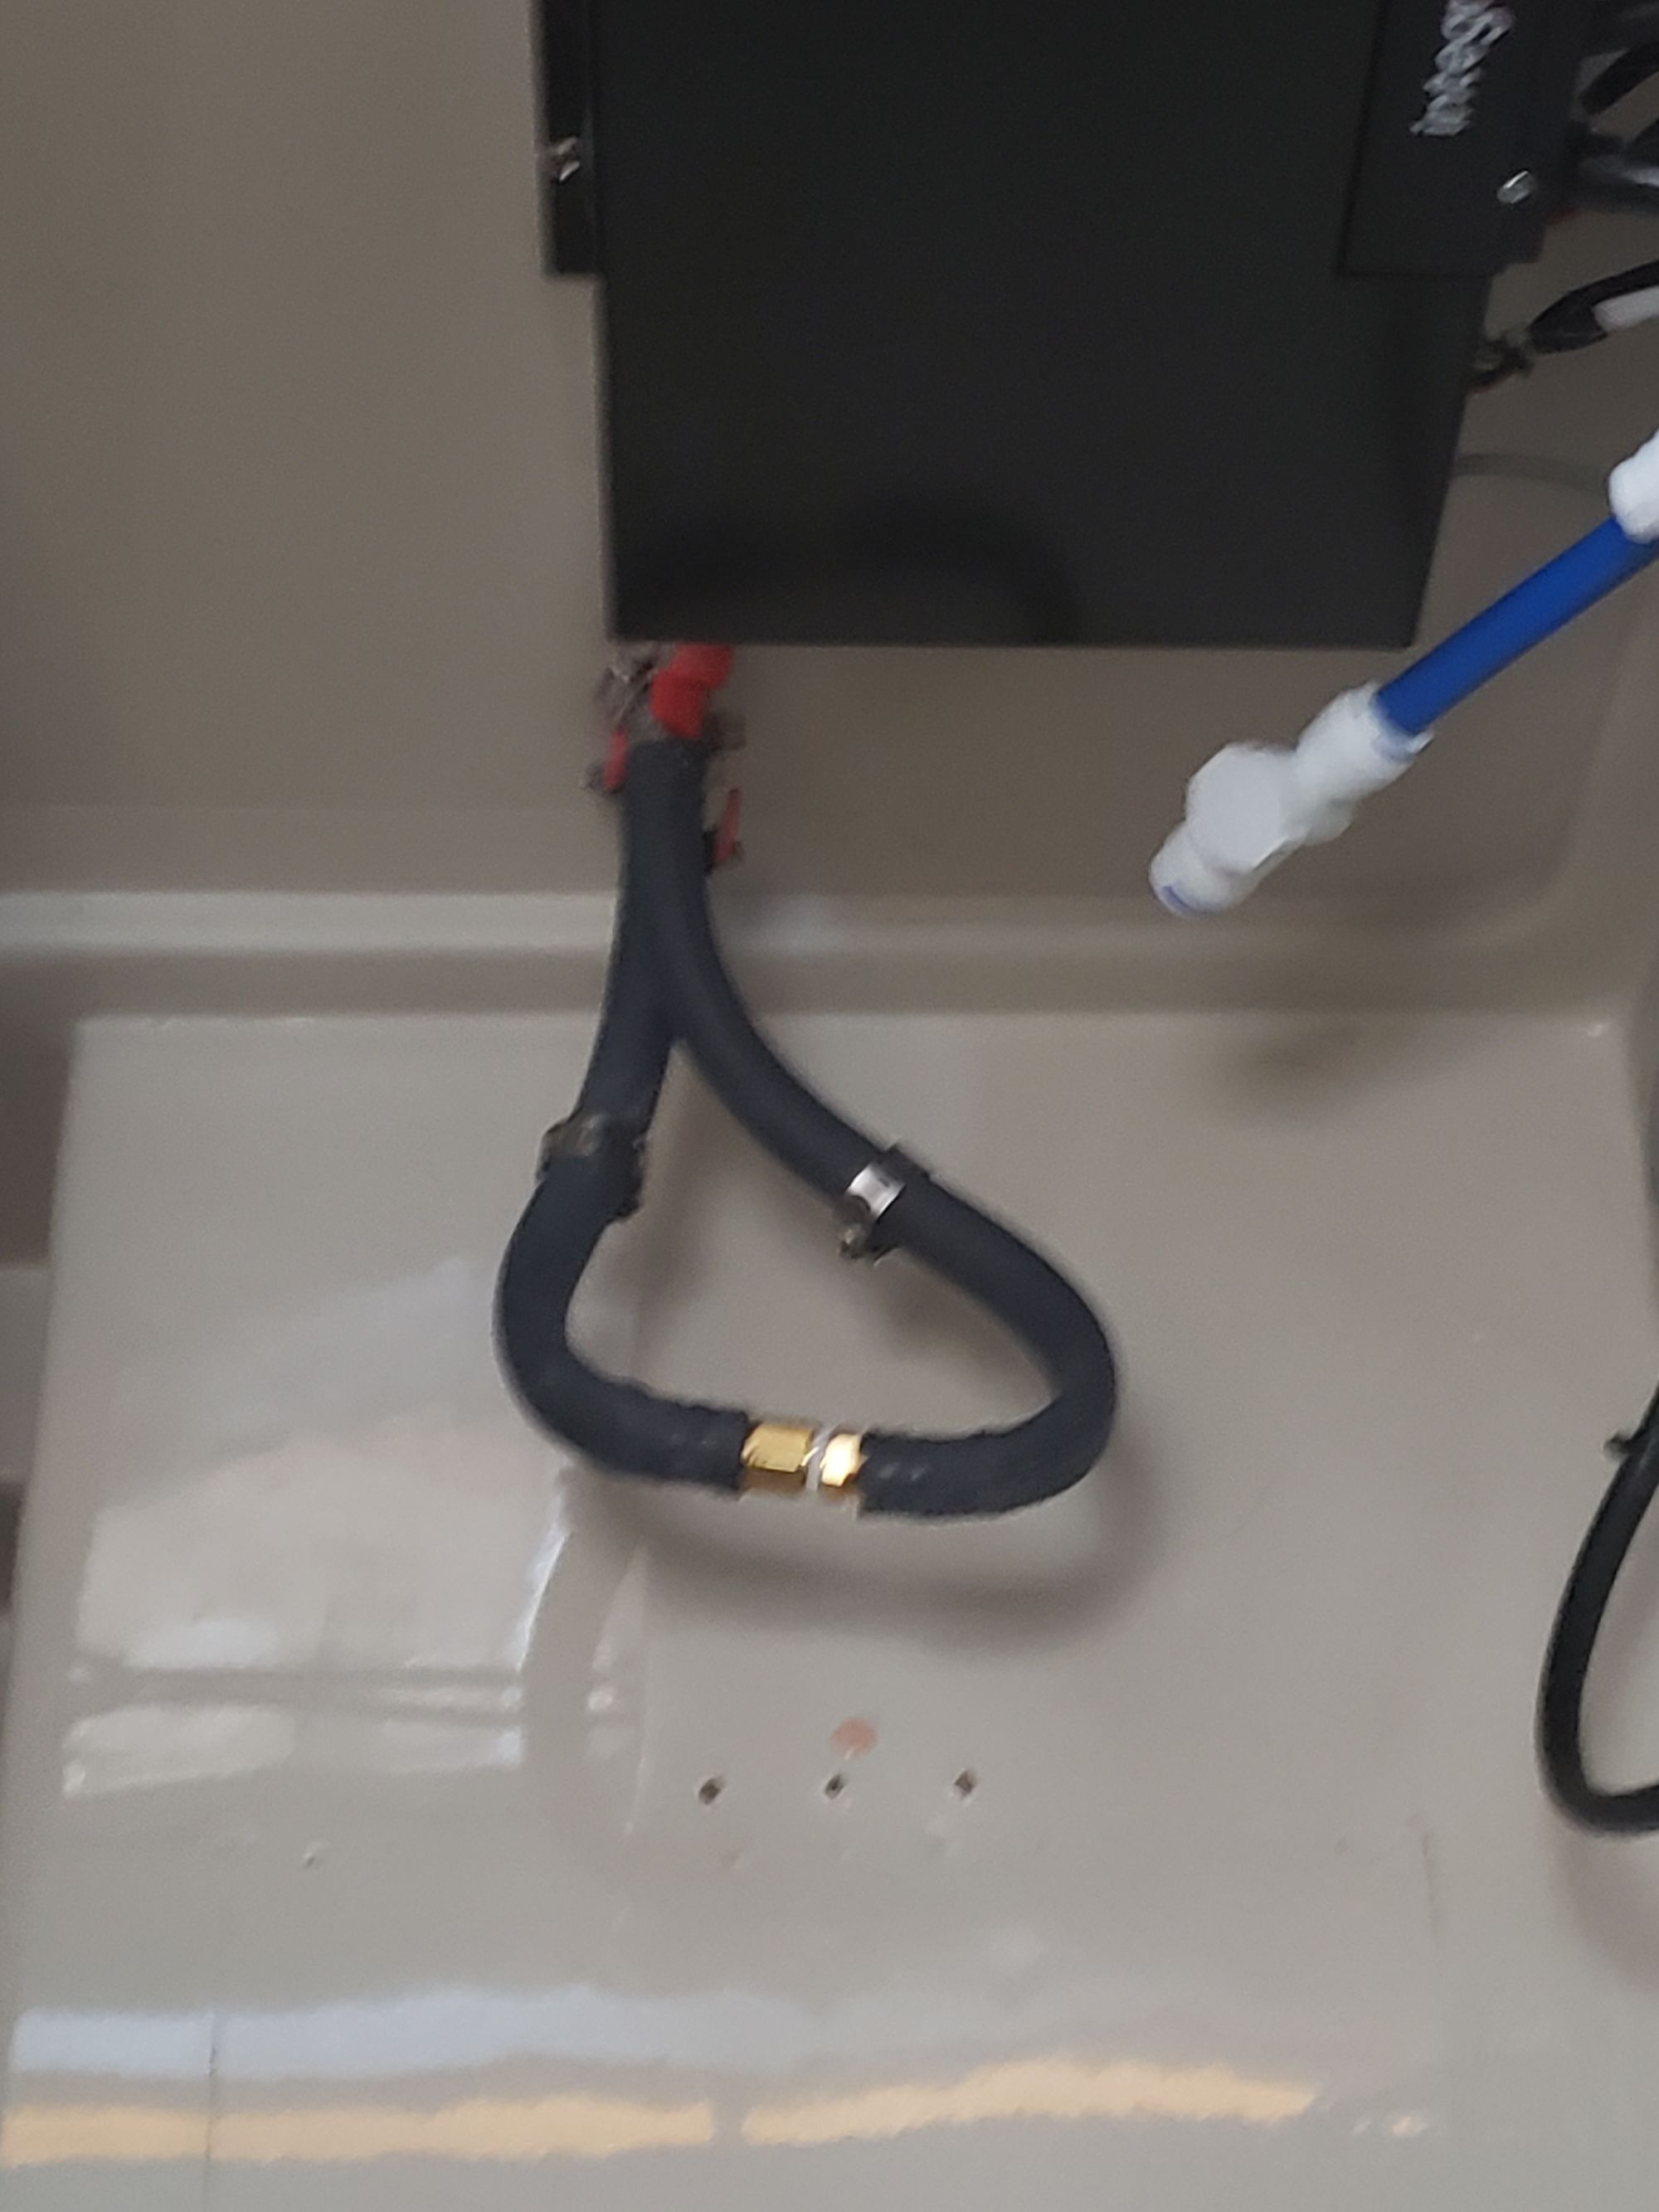
On boats, it is common to use the heat generated by the engines to help heat water in the water heater. Basically, whenever we run the engine, we get hot water for free. This is done by running the hot antifreeze coolant that comes out of the engine through hoses that lead into the water heater and then back out to the engine's secondary heat exchanger (which uses sea water to cool down the antifreeze). That's what the 2 black pipes here are:
I need to remove the hoses and (as much as possible) prevent the coolant from leaking out. This will require a coupler to connect the ends of the hoses together. I don't have that on board, so that means a trip to the local chandlery (a hardware supply store for boats). While I'm there, I should also see if they have a water heater and some other items...
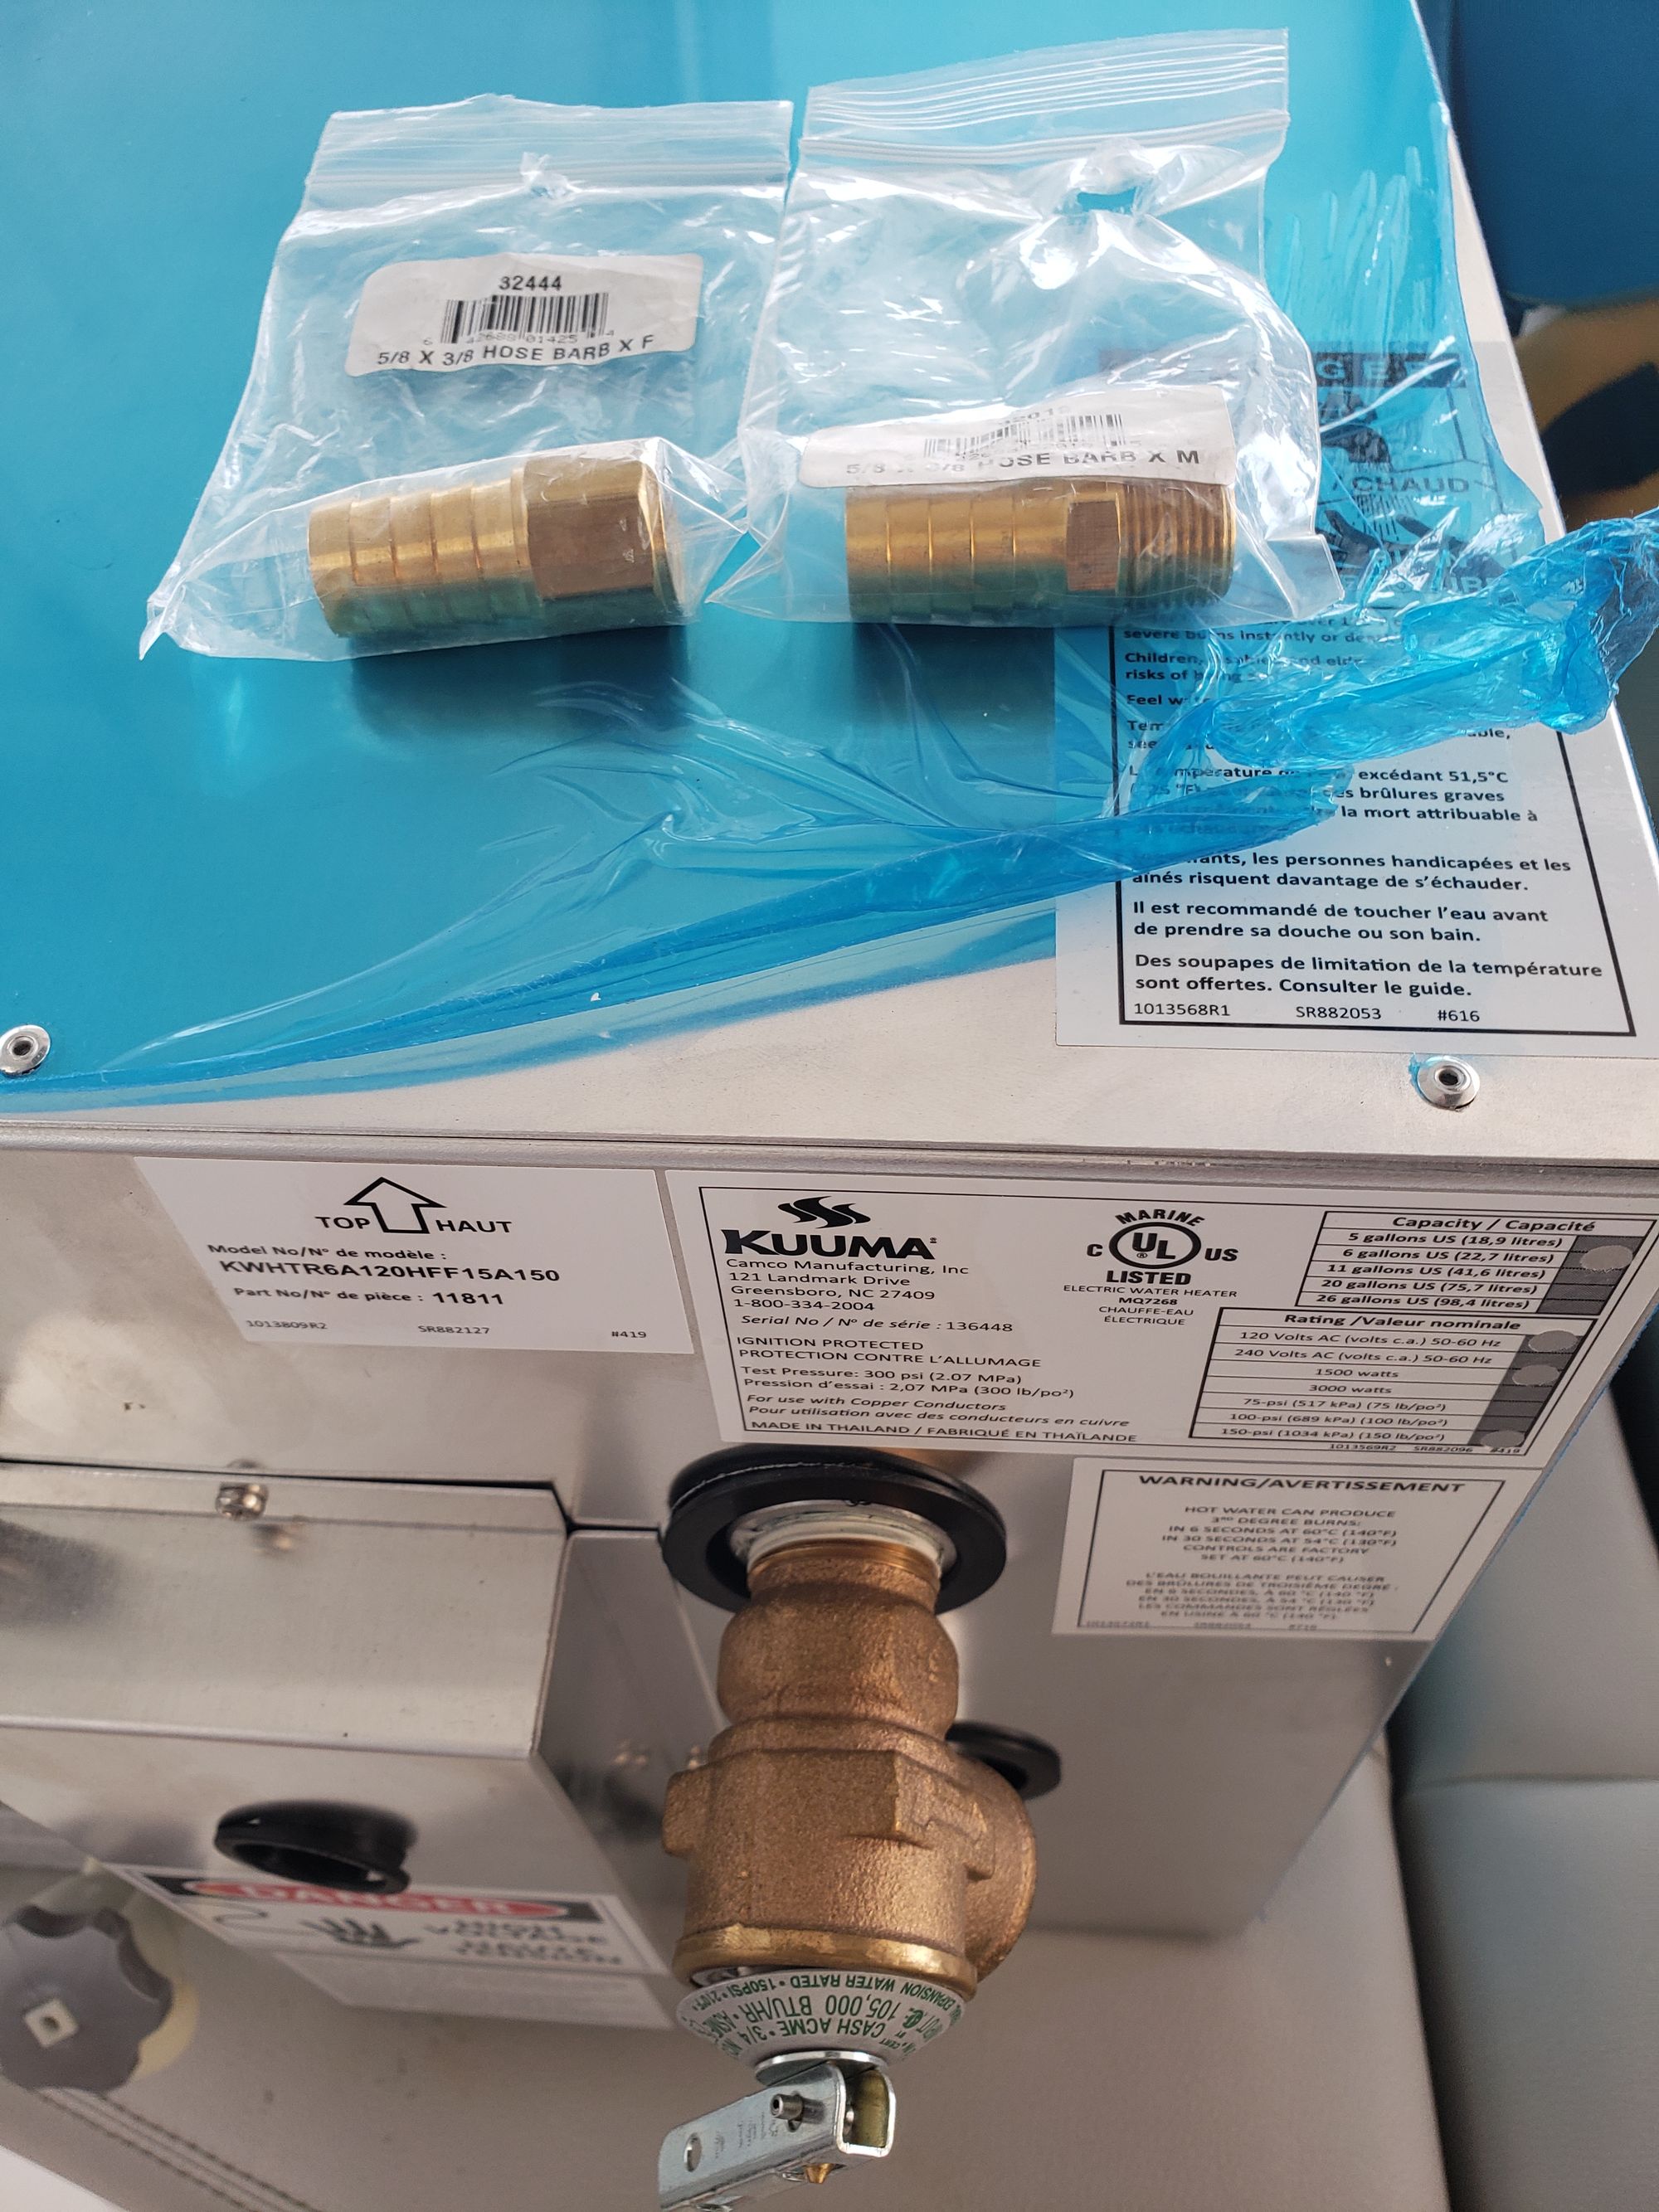
They did indeed have the exact water heater that I need! It isn't cheap...but I don't know what's wrong with the old one, so I'll grab it in case the old one isn't repairable. They also had components to make a coupler for the coolant hoses, and some, but not all, of the other things that I wanted.
Ok, cool, this should be enough supplies to allow me to finish removing the leaky water heater. The 2 halves of the coupler get screwed together with copious amounts of Teflon tape, then I very carefully remove the band clamps from each hose and wiggle the hoses off of the barbs from the water heater, then connect them together with the coupler. I think I managed to lose only 1/4 cup of coolant, not too bad.
Next up is the electrical side. First, make sure the breaker is off. It's really off, right? Like, really really off? Right.
The wiring going into the water heater uses blue, brown, and green wires. Green is usually ground, and the others are hot and common. The water heater has black, white, and green wires. Great. Let's take a picture of this and write down the connections, I don't have the brain power to remember it. If it worked before then it should work after I restore these connections.
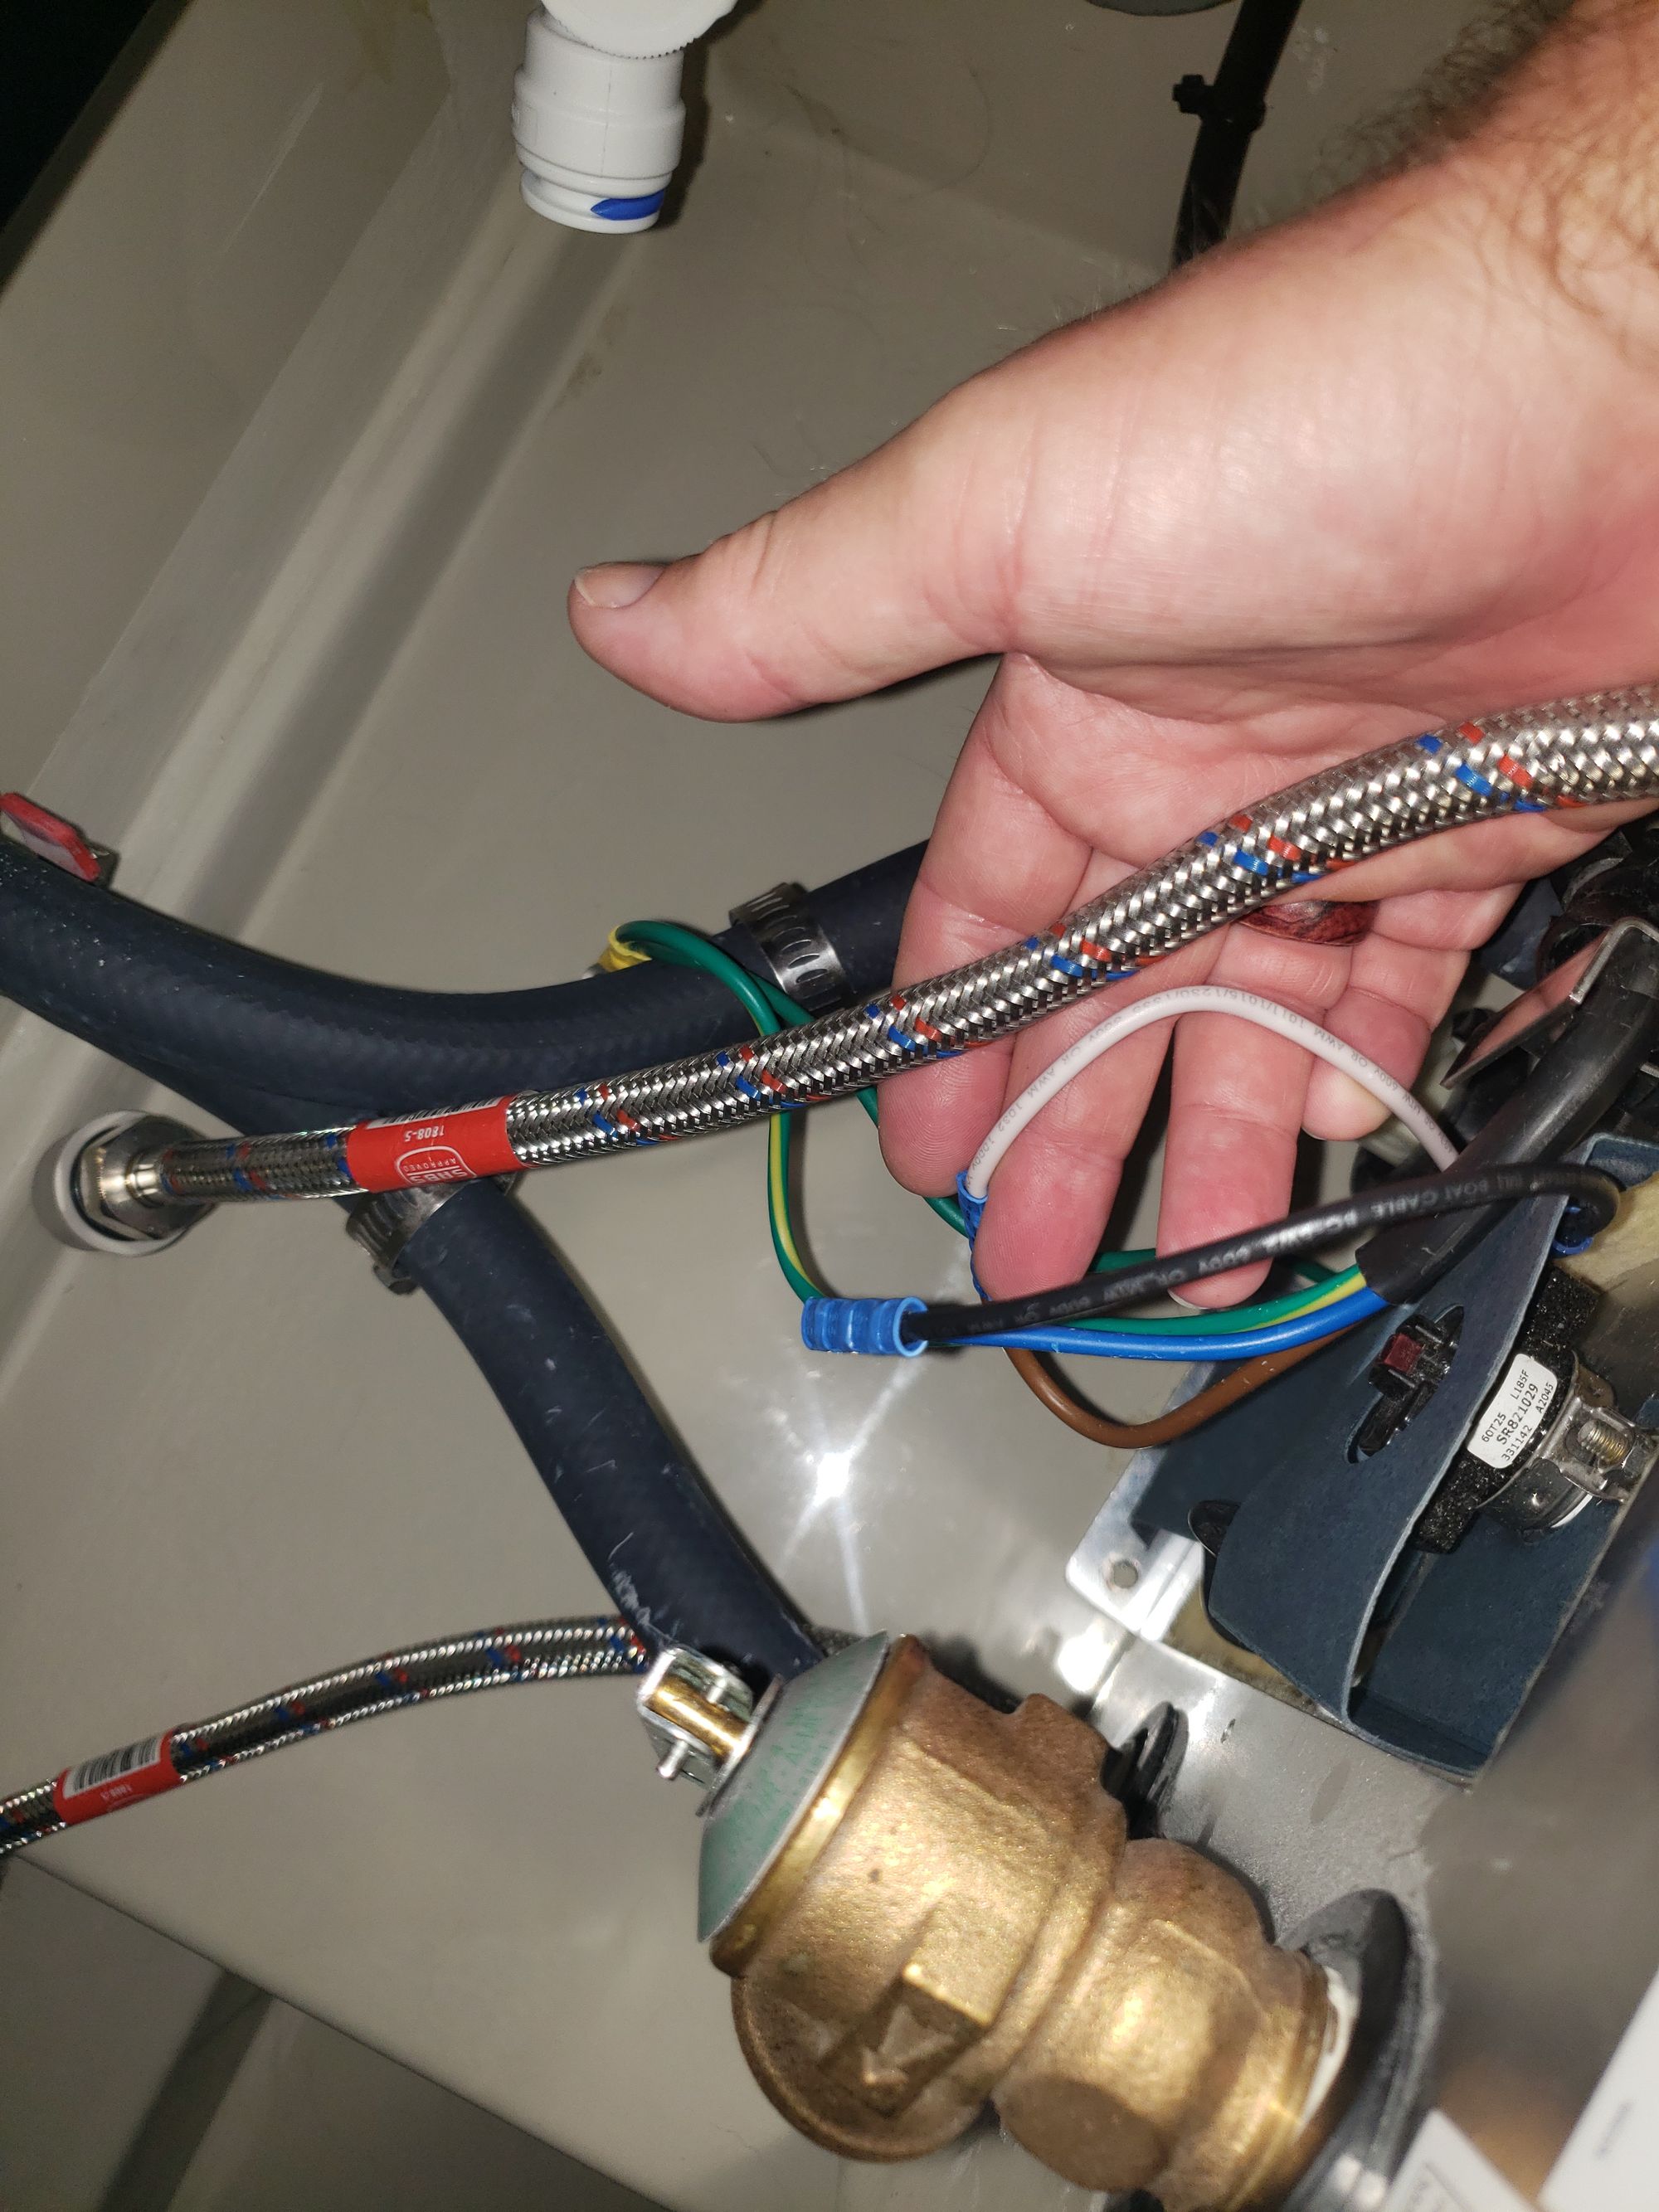
Time to cut the wires and remove the leaky water heater. Wait, the breaker is really, really, really off, right? Let's put some tape over this just to be sure...
Cool, wires cut, no sparks, and the water heater is out in the aft cockpit next to the new one. Everything looks the same between the two units (except for the protective shield that I removed from the old one).

I gave everything a thorough look, and I don't see any signs of water stains near the hoses, the temperature gauge, etc. The welds all look ok with no obvious cracks or holes. The leak must be from somewhere inside the heat shielding. I'm not going to take this thing apart to look for the leak, I would have to drill out the rivets, remove the fiberglass insulation, etc...since it doesn't appear to be anything obvious, I'm just going to install the new one and be done with it.
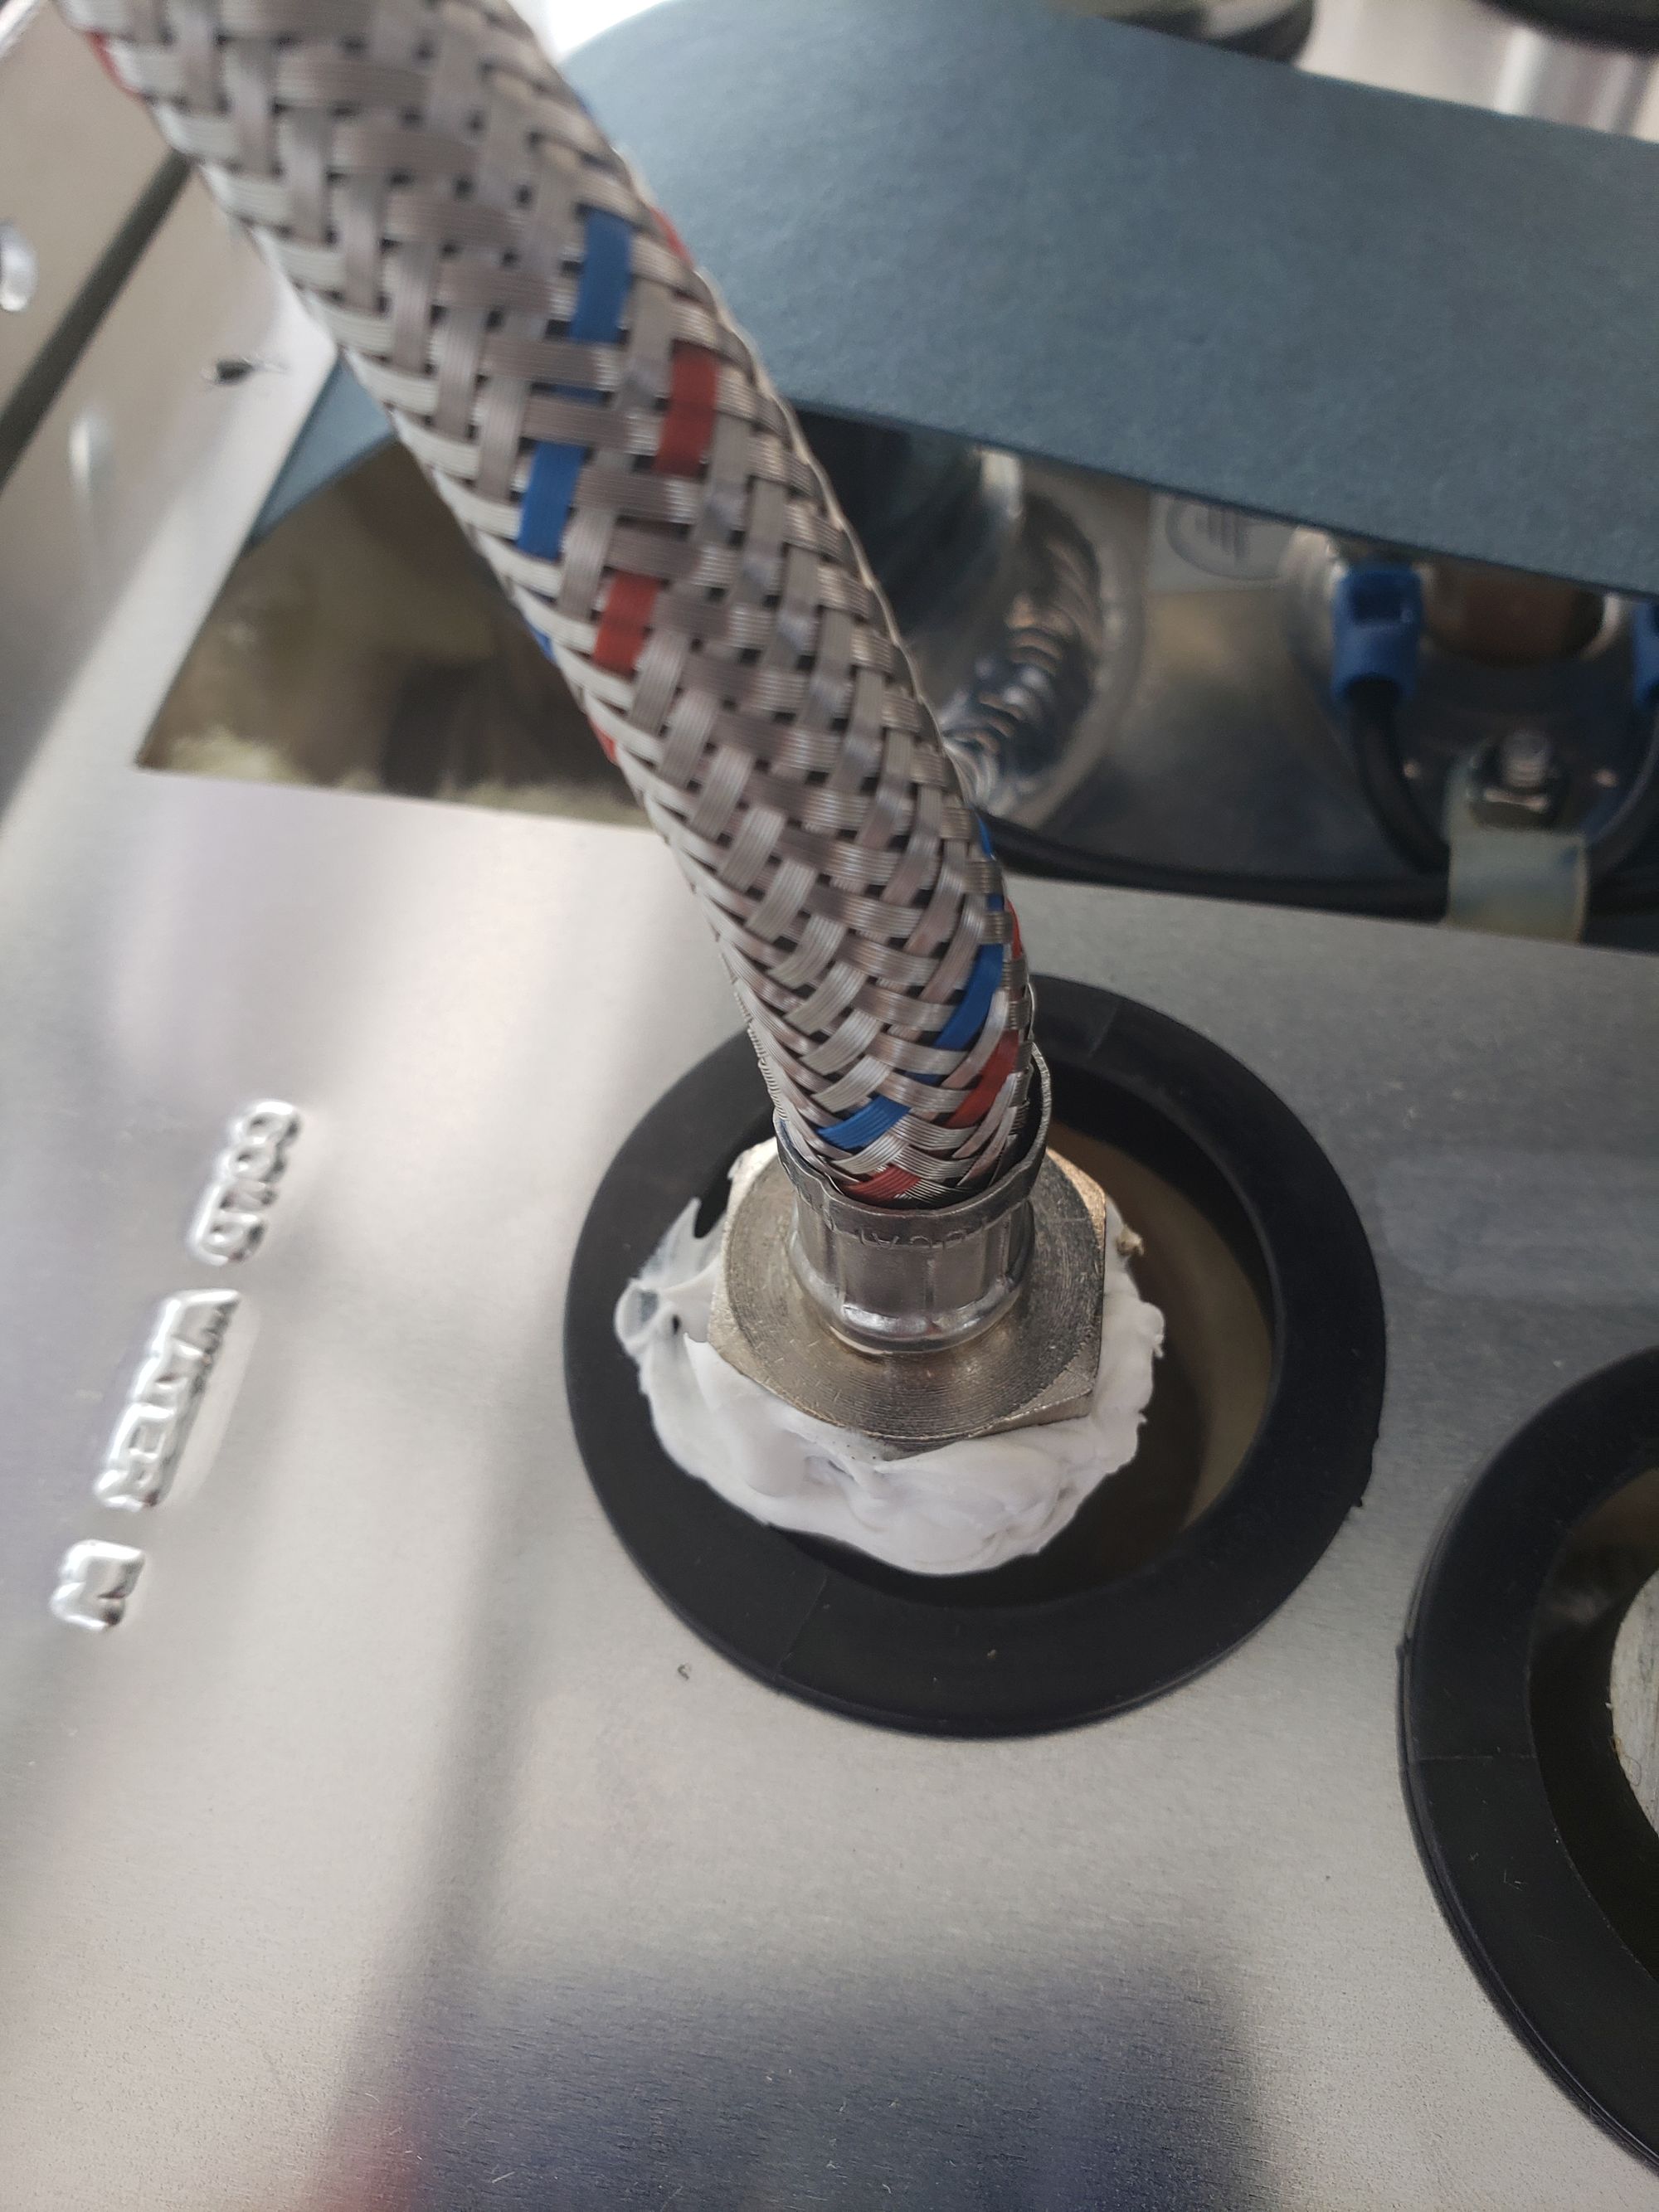
Step 1 of setting up the new water heater is to move the water hose connections over. Good lord they are on tight. Is that sealant on the threads? Yes, I believe it is sealant, probably Sikaflex. Why on Earth would they do that instead of just using Teflon tape?
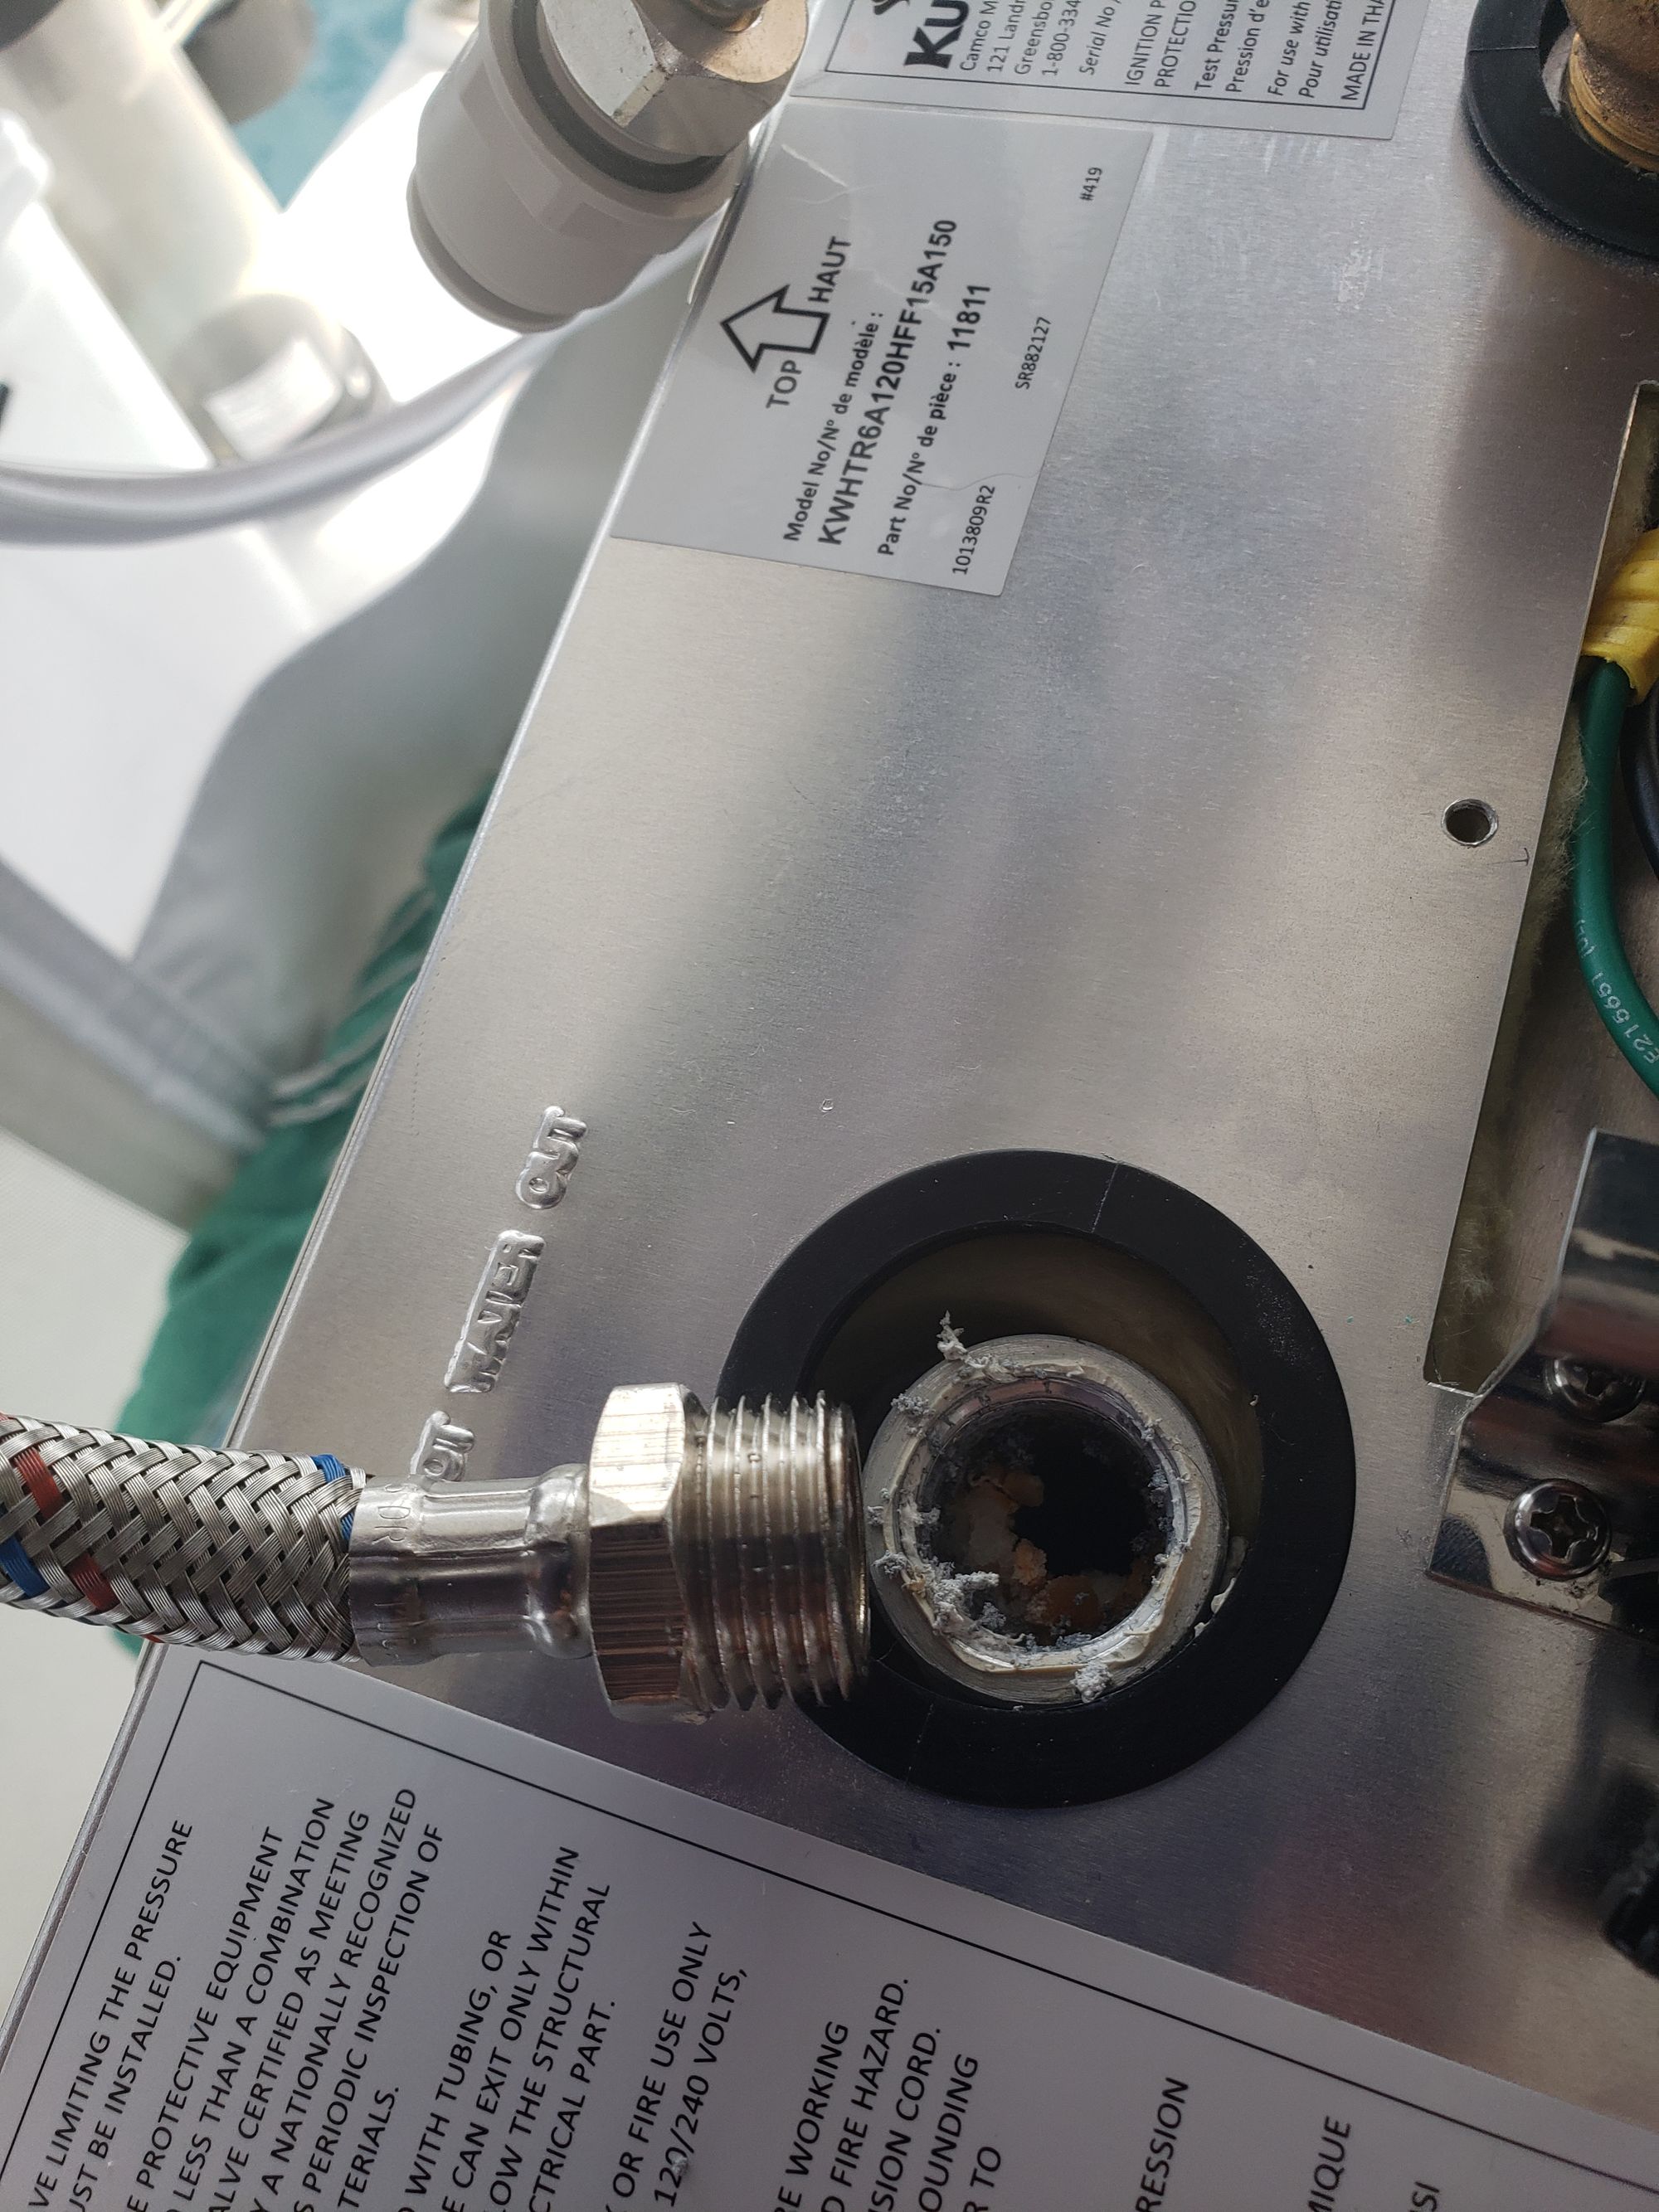
I spent a few minutes thoroughly cleaning the threads of each hose, checked for signs of cross-threading, burrs, or any other issues, they both look good. I consulted with a friend who had replaced the water heater in his boat last year, and he confirmed that it should be ok to use Teflon tape. Maybe they used sealant just to keep it from vibrating loose?
I added 4 wraps of tape to each hose connector and screwed them in tight. Afterwards, I added a bead of sealant around the edge for vibration protection, just in case. That should do it, right?
There's one last step before taking the new water heater down to the bilge...
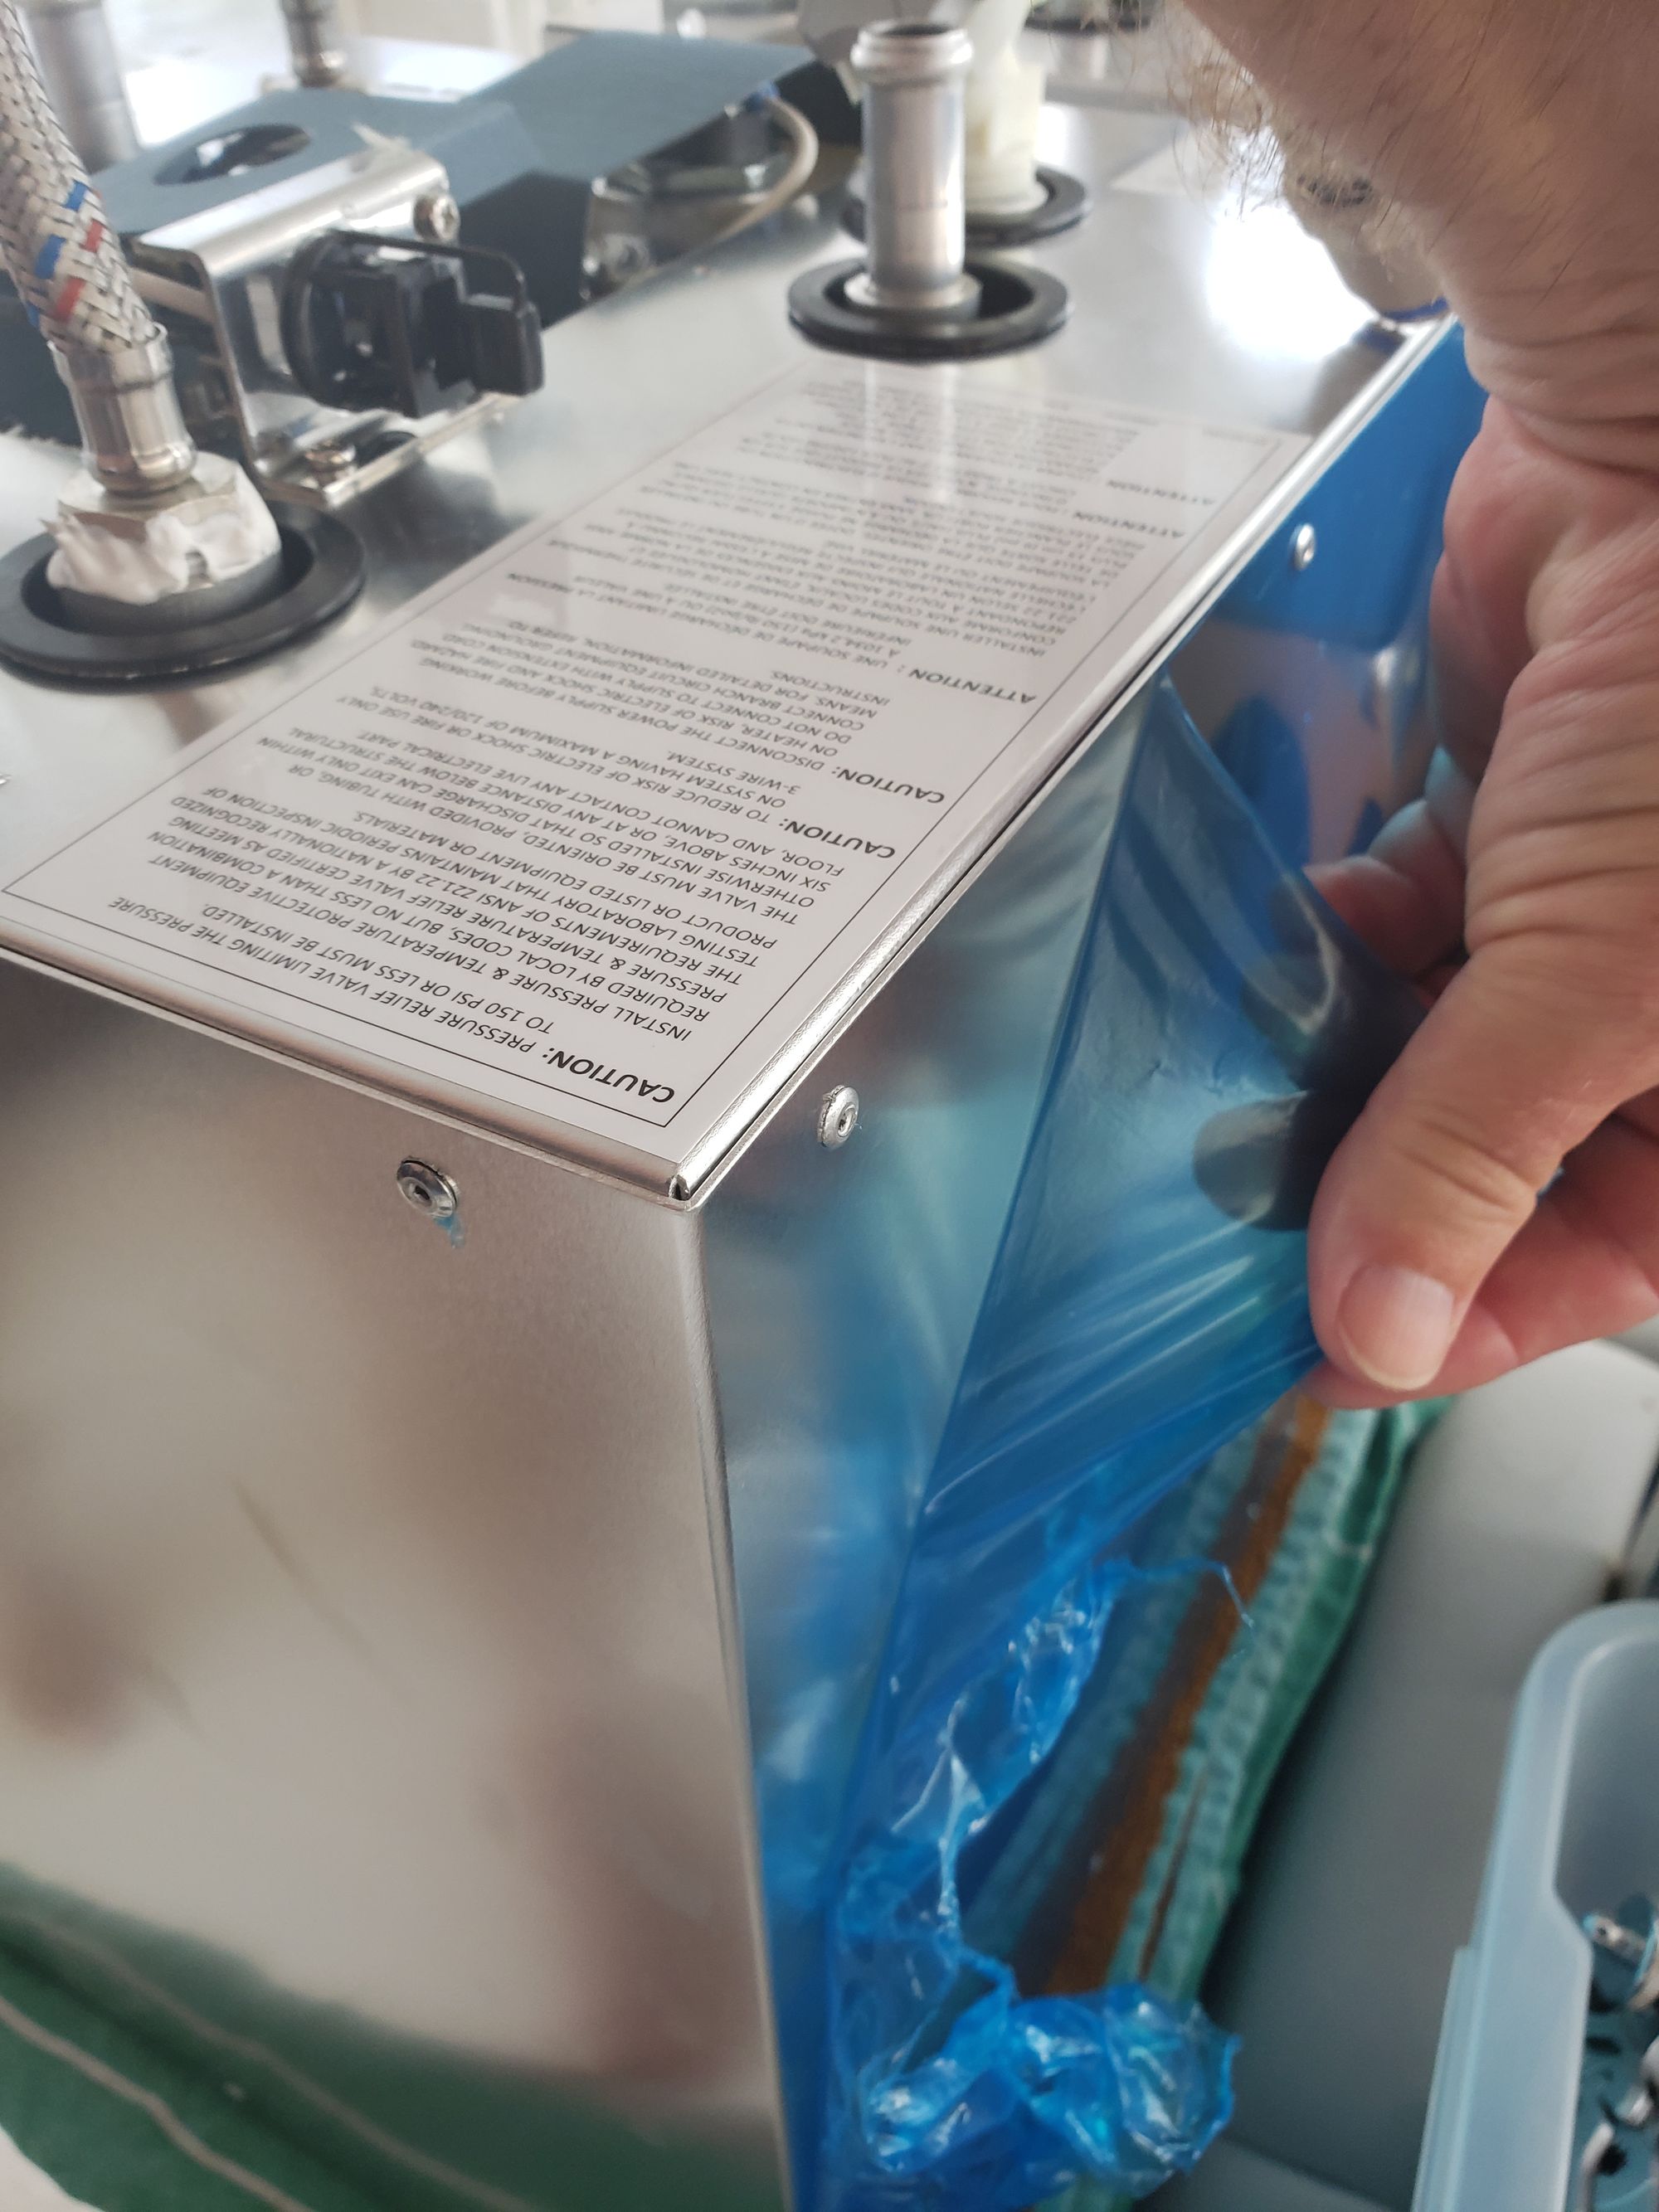
Oh yeah, this is so very satisfying...
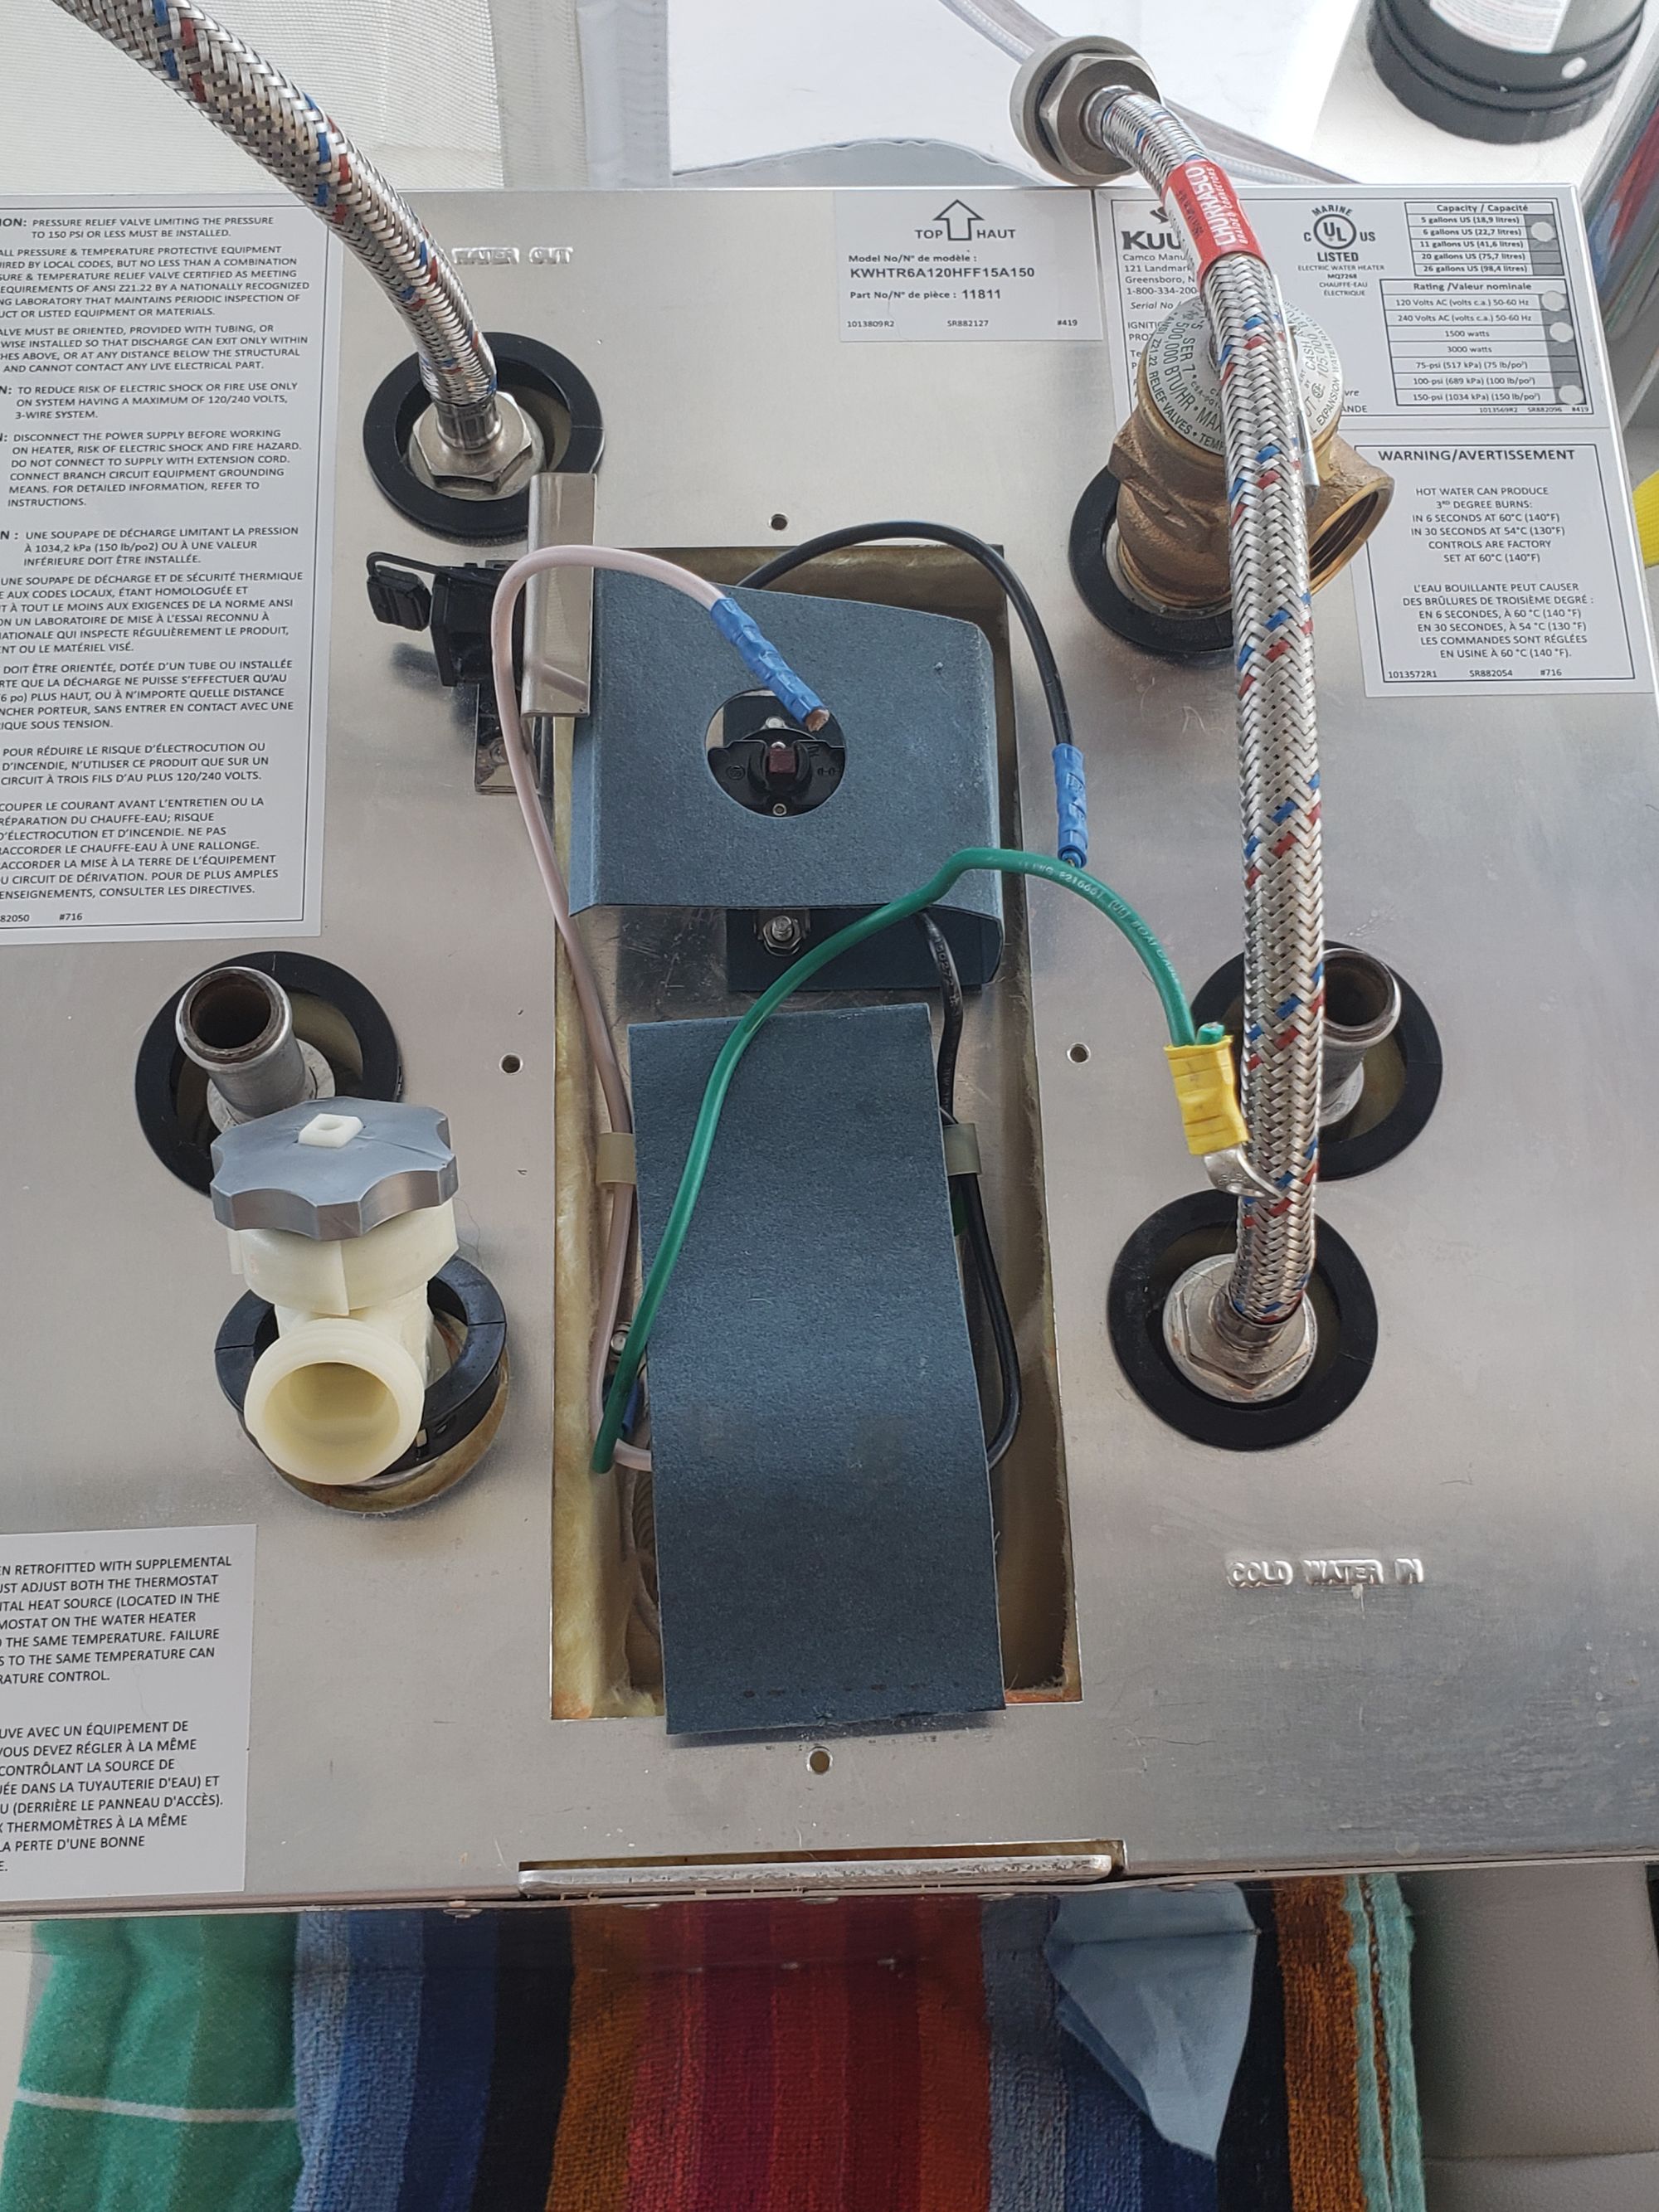
With the water heater in place, I need to cut a short piece of pex pipe to connect the new valve with the cold water inlet hose.
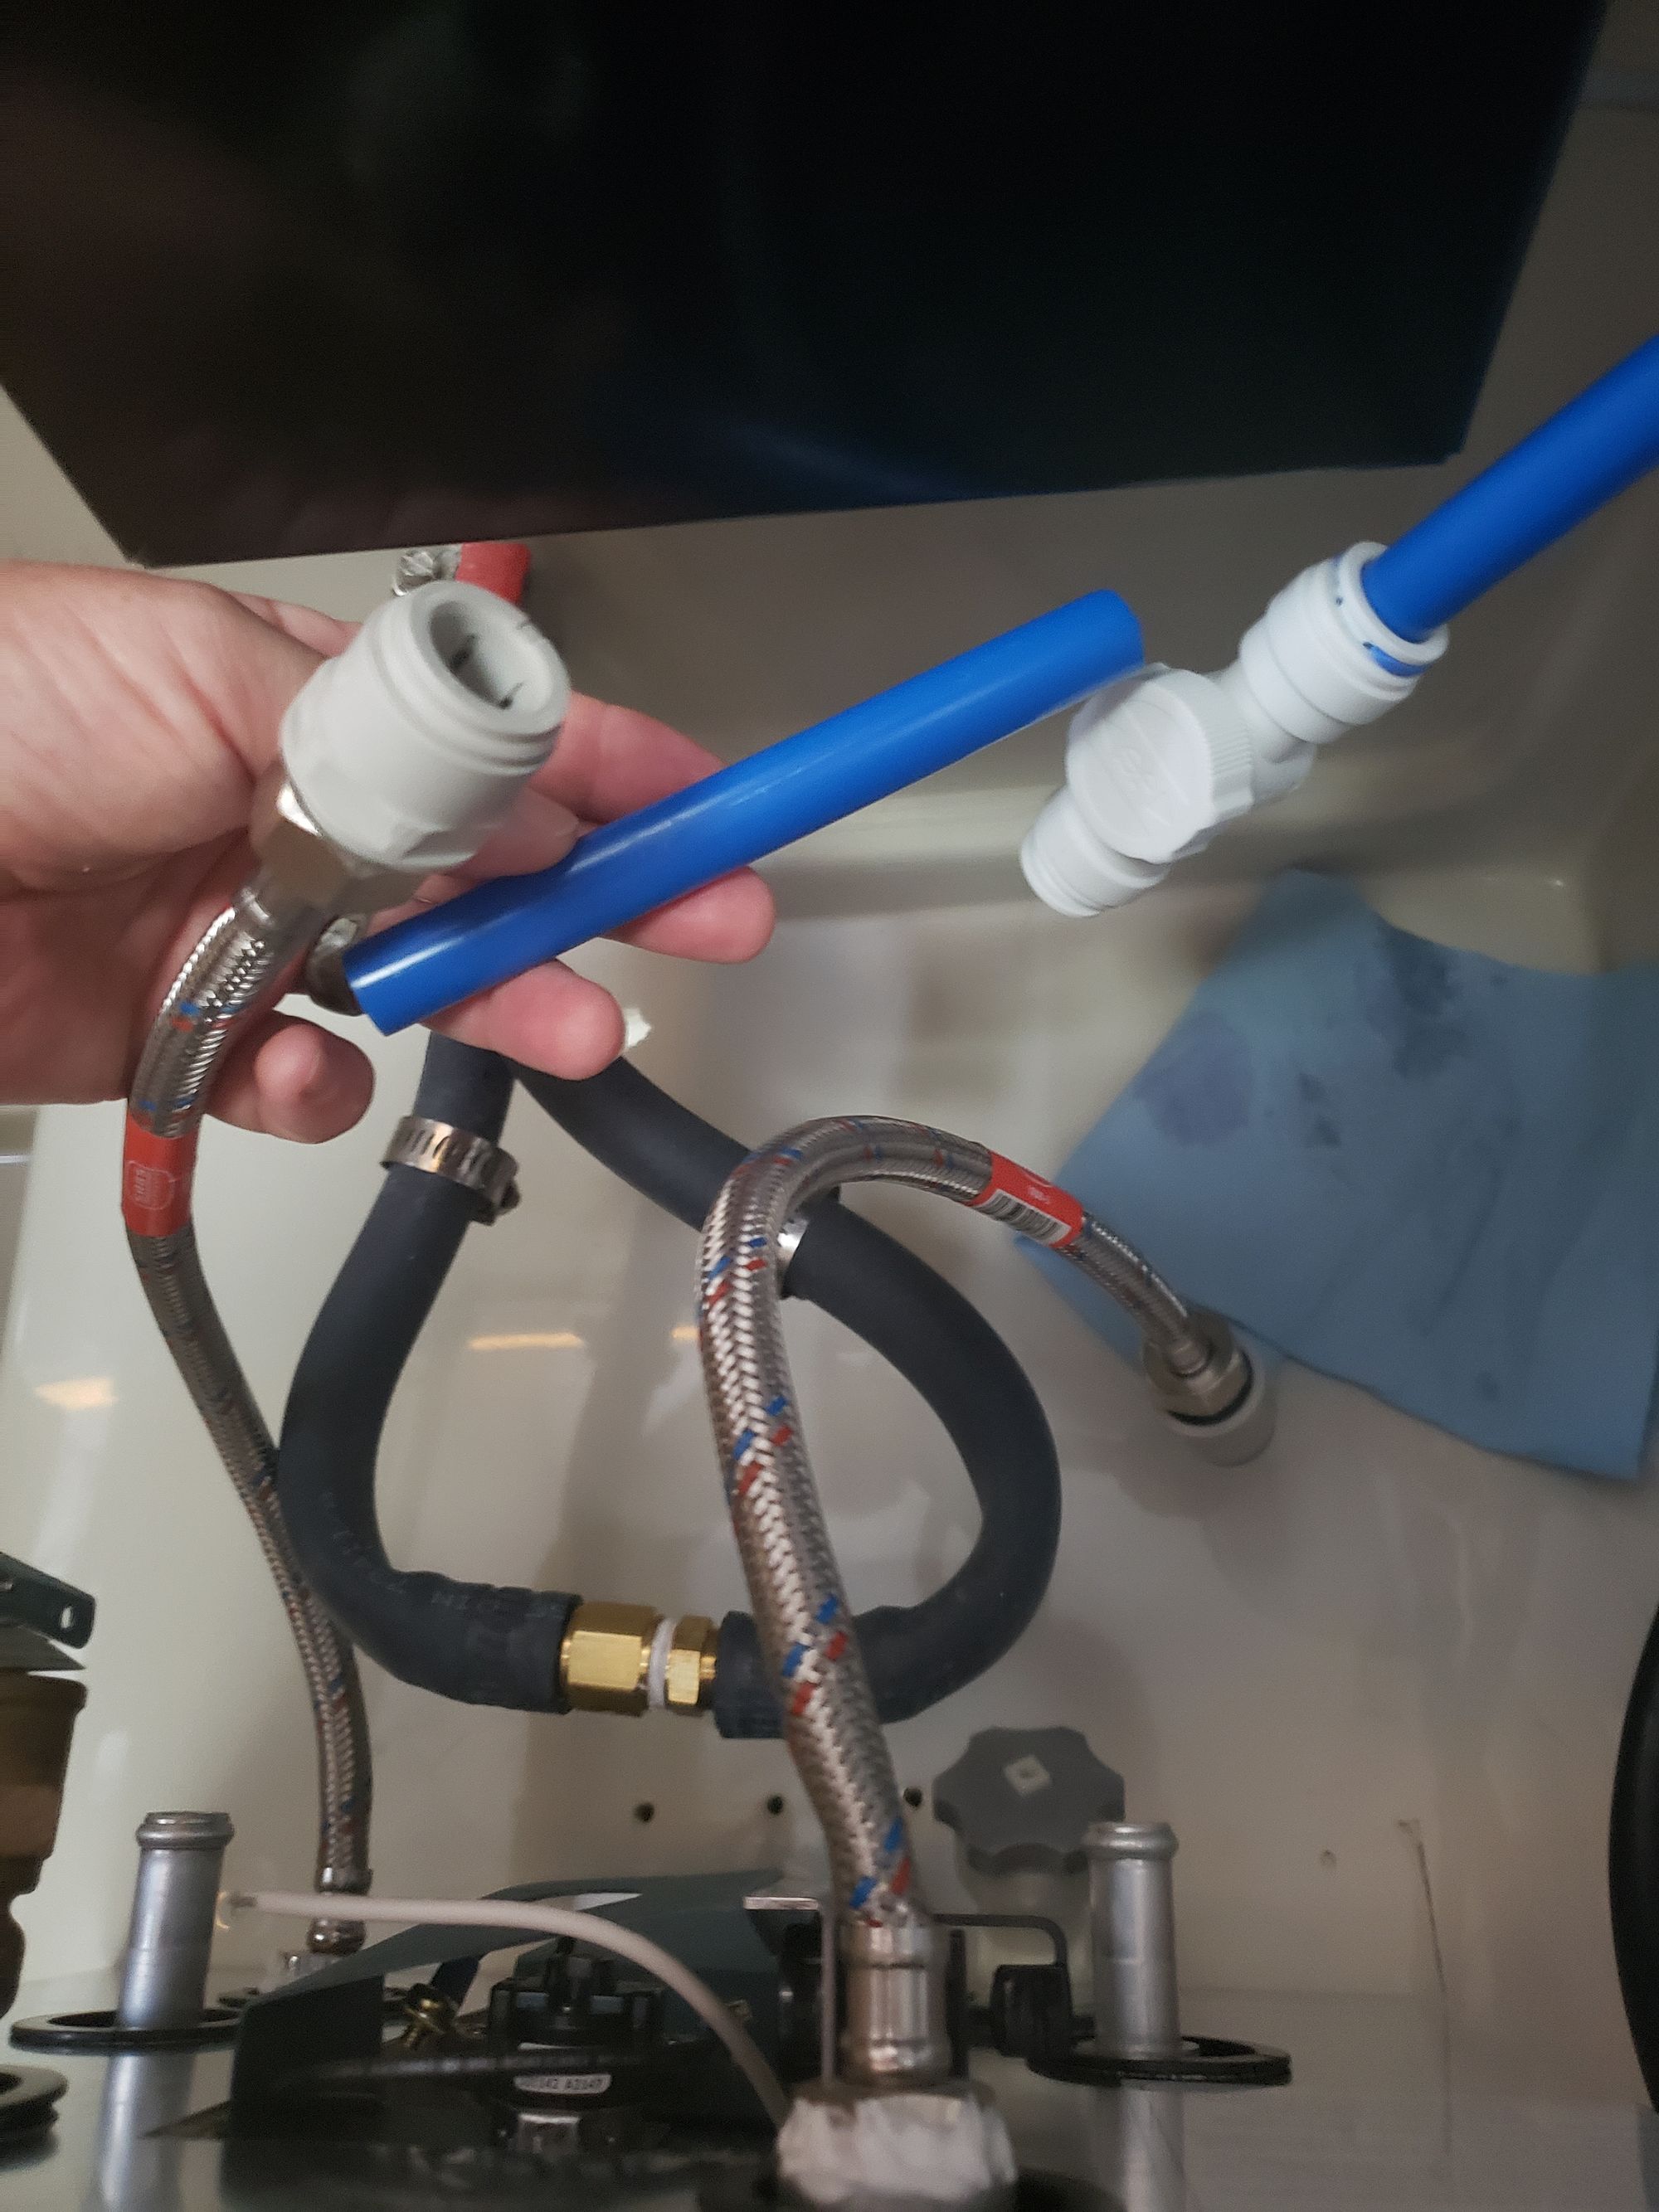
The hot water side doesn't have a valve, so I can just connect it to the red pex.
Now comes the moment of truth. Does it hold water? Turning the cold water valve 1/4 turn, I hear water starting to flow, the pump kicks on. So far, so good. Now we wait for 6 gallons to be pumped into the tank. I went to the sink in our bathroom and opened the faucet with just hot water flowing to let air bleed out of the system. It sputtered and gurgled for quite a while before I got a consistent stream of water.
Let's wait for the water pump to stop running and check for leaks.
Verdict says?

Oh no...no no no no. (The words I said next fully established me as a salty sailor, I won't print them here...).
Ok, I guess that explains why they used sealant rather than Teflon tape.
More "salty sailor" words flowed as I realized that I need to remove the hoses in order to apply sealant to the threads, and that means draining the water heater again. And pumping the water out of the bilge again. And drying the bilge again.
And here we are, right back to square one. It's getting late, and I'm still salty. I'll just call it a night and pick back up in the morning.
(Stay tuned for part 2...)